| |
|
Click on a thumbnail picture below to see the full size version.
|
116 Entries.
|
|
Saturday, April 6
|
View Page
|
 |
2024 Growing Season
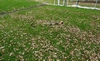
The start of the new season can often overlap with the previous season and this year is no exception. The hoop house was moved about 32ft in anticipation of the 2024 growing season. There were no obvious problems at the last location, but this is the best time to move� before soil issues.
This site was last grown on in 2021 and while it may be a lot of work to make this move the hopeful reduction of disease issues in season justifies this work.
With the demands of the in-season growth the soil must be in good tilth and quality. When growing an intensive crop, it is important to keep this in-mind and practice rotations when ever possible to reduce the chance of issues building up over time. Soil treatments can offer some reduction in issues, but a plant rotation is the best method.
For ease turf grass (Northeast mix) is used as a cover crop as once established it is a monocot and holds moisture well and creates an environment supportive of earthworms that does not require tilling or other soil equipment, just a regular mower to keep the grass at lawn height (about 3.5�) is all that is needed.
Nutrient Management for Cucurbits: https://ucanr.edu/sites/nm/files/76628.pdf
|
|
|
Saturday, April 6
|
View Page
|
 |
Initial Site Preparations
Today the focus was on initial site preparations which started off by weed-whacking the grass down to close to soil height. The reason for this is to help make the amendment application and tilling process to come shortly, as easy as possible.
For those interested in proper Cover Crop Management: https://www.sare.org/publications/conservation-tillage-systems-in-the-southeast/chapter-5-cover-crop-management/cover-crop-management/
|
|
|
Saturday, April 6
|
View Page
|
 |
Adding Amendments
Here is the line-up of nutrients added to the growing site for this year. While there may be a bag of each shown in the image this does not represent the exact quantity added. For the actual numbers this is calculated with the results of a soil test. However, the list is as follows that was applied over about 1,100sq.ft. of growing space�
-Calcitic lime (50 lb)
-Peat Moss (33 cubic feet added)
-Gypsum (160 lb)
-Sulphate of Potash (0-0-50) (30lb)
Micronutrients
-Ironite (14 lb)
-Borax (1 lb)
-Zinc Sulfate (0.5 lb)
-Manganese Sulfate (3 lb)
-Copper Sulfate (0.5 lb)
While manures can be effective, only leaf-based compost that was added five years ago and has been serving as the base soil amendment. This has increased overall organic matter and since it is in the target range no more has been added. This is part of a new concept being referred to as �Soil-Hydro� (with hydro being short for hydroponics which by definition is grown plants without soil). This odd word choice is used because the idea is that the soil is providing the base substrate to grow the plant and the grower will add in what the plant needs to �eat� during the season much like a hydroponic growing set-up would require.
This Soil-Hydro concept offers the stability of soils buffering capacity along with the depth the giant pumpkins roots can expand along with the added bonus for growers to dial in different nutrients that can be timed with the stage of plant growth creating the best of both worlds.
Soil Management Practice Comparison for yield and quality of pumpkin:
https://www.researchgate.net/publication/350763593_Yield_and_Quality_of_Lettuce_Pumpkin_and_Watermelon_Varieties_Grown_Under_Five_Soil_Management_Practices
|
|
|
Saturday, April 6
|
View Page
|
 |
Amendments Successfully Added
This is what the growing space looks like now that the amendments have been added. No time for tilling today, but with the short grass mostly covered it will not regrow very quickly providing time to till at a later date with no negative impacts.
For those that have a tractor here are the top-10 implements recommended to have on hand to make farm life easier� https://tipsnotebook.deere.com/top-10-implements/
|
|
|
Monday, April 8
|
View Page
|
 |
Soil Heating Cables
Here is the area (about 5ft. x 5ft. x 1 ft deep) that is where the 40ft soil heating cables will be buried. The soil is initially excavated and then the bottom is pitch forked to increase aeration and water infiltration. Doing this about 12-inbches below the soil surface helps increase drainage and keeps the main starting area on the dryer side which should help mitigate potential issues in this very important area of the plant.
Soil Heating Cables Guide: https://www.frogchorusfarm.com/soilheatingcables.html
|
|
|
Monday, April 8
|
View Page
|
 |
Soil Heating Cables Pattern
This shows the basic pattern that is used to lay out the heating cables. While there is an inline thermostat an external one will be used making this exact pattern less important.
Reason for the external thermostat is to not only know what the temperature actually is in the root zone, but to ensure it does not get too hot and is under a reliable controller. In the past the inline thermostats have failed resulting in plant damage due to overheating of the root zone. This all-in-one live sensor and controller (which will be shown in the future posting) help keep conditions regulated and consistent.
Tips for installation of soil heating cables: https://morelectricheating.com/media/assets/product/documents/Wrap_On_Gro_Quick_Soil_Warming_Heating_Cable_Installation_Instructions.pdf
|
|
|
Monday, April 8
|
View Page
|
 |
Initially Holding Cables In-Place
All cables are tested before going into the ground and this not only ensures they are working, but also helps make them easier to bend into the desired pattern. Using some simple bamboo stakes to help with the hair-pin turns and then adding some soil to set them really does make the process easy.
Keep adding more and more soil until all of the cables are covered and then the bamboo stakes can be removed and everything should be just as you left it.
Additional Soil Heating Cable Installation Information: http://www.arctictrace.com/docs/installation-soil-heating.pdf
|
|
|
Monday, April 8
|
View Page
|
 |
Soil Heating Cables Installed
If everything is done right, it will look like you did not do anything😉
However, it is important to mark the corners with stakes so when the area is tilled the �no till zone� is evident to prevent damaging what took time to put in place.
|
|
|
Tuesday, April 9
|
View Page
|
 |
Progress is Being Made
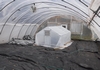
Taking advantage of a rare non-windy day a lot was accomplished. End wall plastic was put up, the sides insect netting and plastic was also installed. Time also allowed for the top �roof� plastic to be put on and wired in. There was even enough light left in the day to till the area, so productive day, just no time for pictures;-)
Tips for Installing Greenhouse Plastic: https://www.tunnelvisionhoops.com/bloginstall-greenhouse-top-cover/
|
|
|
Tuesday, April 9
|
View Page
|
 |
Peroxide Soil Drench
Even though the soil has been rested for two years a peroxide drench was still applied to help reduce any potential carry over issues. This was done after all amendments were added and the entre growing site was tilled. Essentially the soil is �good to go� and then the drench was applied just before planting. Since the peroxide it is most effective in the upper portions of the soil profile as it percolates down, by drenching after the soil is mixed and in place, the peroxide is most active where the roots start and are most likely to be for the season.
Since drenching is done by hand it is important (from the applicator stand point) to ensure that all areas are covered. This is a contact only product so full coverage is essential for effectiveness.
Goal is a 300ppm solution
Procedure Followed�
-Ensure soil has some moisture already present to ensure a quick peculation of the drench in the soil profile
-Applied around sunset since UV light can degrade the product quickly
-1,000sq.ft. is drenched with about 275 gallons of water
-3 gallons of peroxide are added to the water tank immediately before application
-Entire area is drenched twice over to help ensure complete coverage
Scientific Articles:
https://openurl.ebsco.com/EPDB%3Agcd%3A11%3A8008603/detailv2?sid=ebsco%3Aplink%3Ascholar&id=ebsco%3Agcd%3A136081950&crl=c
https://academic.oup.com/jambio/article-abstract/121/2/519/6717265
|
|
|
Wednesday, April 10
|
View Page
|
 |
Seed Starting Day: Chosen Seed 2287 Sadiq 2022
Only growing one plant make seed selection this much more important. In the end what it comes down to is what do you have confidence in as if you are not happy with the seed you are not going to put in the full effort these plants require.
Since this plant will be going in a hoop-house knowing this seed came from Utah where the normal outdoor conditions are like a hoop-house the hope is this will do well in the structure. Time will tell on this, but this was the thought process behind the selection.
Older video, but core content is the same: YouTube
|
|
|
Friday, April 12
|
View Page
|
 |
Seedling Starting Mix
While there has been some early iron deficiency noticed in years past, there was the curiosity if it was the starting material. So, to test this theory, this year Sungro Black Gold was selected to use as the seed starting mix. It has a nice consistency to it and other growers report success with it. There is nothing wrong with this mix and the fact that is comes in a small bag is easy for growers to use what they need for the seasons and get a fresh batch for next year.
However, seeing how the seedling progressed this year, it seems the iron deficiency seen in the plants is not related to the starting mix and it may be related to the early season peroxide drench that is done to the soil. Luckily it can be corrected with some iron fertilizer applications, just something to add to the early season list to increase odds of success.
Interesting Potting Soils Comparison Video: YouTube one has the Black Gold in the line-up: https://www.youtube.com/watch?v=SBrsdGWNhxU
|
|
|
Sunday, April 21
|
View Page
|
 |
Cold Frame Inside Hoop-House
While growers often use terms like cold-frame, greenhouse, and hoop-house interchangeably, each has their own definition and meaning. The terms will be kept consistent here in hopes to avoid potential confusion.
The reason for this additional cold-frame is to help increase control over the environment immediately around the pumpkin plant in the early stages of growth. Since the plant is small and heat is a needed, keeping the area small helps to increase heating efficiencies.
The overall dimensions of this structure is 8ft. wide and 12ft. long and 6ft. tall at the peak. The width and length were specifically chosen to match the size of an early growing pumpkin plant with the goal being once the secondary vines touch the sides, the main vine should be touching the end wall.
As a result, this is custom build to ensure it is dialed in for pumpkins. The connectors are galvanized outdoor tent connectors and the main supportive material is fencing top-rail. It is then covered in IR 6mil. greenhouse polyethylene that is held in with U-channel and wiggle wire. There are two access doors at each end and also since this is already in a structure the sides are also able to easily lift up for side access if needed.
*IR Poly = InfraRed and AntiCondensate plastic film. This prevents water droplets from building up on the inside layer. Water droplets may reduce sunshine penetration by as much as 20%. The IR additive seals in infrared energy, assuring warmer night temperatures in the air, soil, and plant tissue in the greenhouse.
However, there are more custom features added that will be described in the following posts�
Scientific Article: �Testing of the condensation characteristics and light transmissions of different plastic film covering materials�
https://web.archive.org/web/20170809035646id_/http://moritz.botany.ut.ee/~olli/b/Cemek05.pdf
|
|
|
Sunday, April 21
|
View Page
|
 |
Custom Control Center Tote
In an effort to keep things organized (controllers and cords) a large heavy duty plastic tote was purchased and the controllers were attached to the outside for easy reading of conditions. This also allowed the inside to contain all of the cords and the lid kept the area sealed off. While the total inside volume was not needed the height was especially for the CO2 controller.
Having everything in one location made it easy to get a full check on the environmental conditions and make adjustments if needed. This not only helped increase efficiency but also made installation and take down very simple since this is only a temporary structure.
Tote Used �Rubbermaid 18gal Roughneck Storage Tote Gray�
https://www.lowes.com/pd/Rubbermaid-Commercial-Products-Gray-Tote-with-Lid/1000389261
|
|
|
Sunday, April 21
|
View Page
|
 |
Soil Heating Cable Controller and Above Ground Reptile Heat Lamp Controller
The image may be slightly out of focus and the values can be read, but the key is the application of these two controllers. The �Jump Start� one on the right has the temperature sensor about 8� below ground to get a reading of the root zone temperature. This is typically set for 70F (21C) and takes about three days to reach this temperature, after this time it just needs to maintain this heat. As a result, this is set-up ahead of the plant going in the ground as a way to check to make sure things is working properly and to ensure the seedling can start growing from day one of transplanting.
Scientific Article:
https://academic.oup.com/jambio/article-abstract/121/2/519/6717265
The �Hydrofarm� controller is essentially the same as the other one, except the sensor is about 8� above ground and senses the air temperature. This one is set for 68F (20C) as having it a little cooler than the root zone can promote more vigorous rooting. This controller is connected to three 100-watt reptile heat lamps that emit heat with no light to not alter the photoperiod of the plant. On cold nights the plant and heaters are covered with a white sheet (that will later go on the pumpkin if all goes well) to vastly increase the heating efficiency.
Scientific Figure Comparing Air and Root Zone Temp for Lettuce:
https://www.researchgate.net/figure/Lettuce-Lactuca-sativa-L-var-longifolia-grown-under-different-growth-temperature_fig2_358625089
|
|
|
Sunday, April 21
|
View Page
|
 |
Cold Frame Vent + Fan Thermostat and Light Controller Timer
The gray PECO thermostat with the metal coils is sensing the air temperature and even though it is an analog version this is perfectly fine. It does need to be set in relation to the other digital thermostat present so they do not work against one another as this one is responsible for cooling and not heating. When this senses the air temperature has reached about 86F (30C) it will turn on an exhaust fan and open a vent. This allows for cooling of the cold frame by moving air. This is also dialed in to work with a similar (but larger) ventilation system for the larger hoop-house structure.
However, when the venting system for the cold-frame is activated the CO2 system can sense this and goes into idle mode so the CO2 is not wasted by being vented out of the structure. Once the venting system turns off, the CO2 system will reactivate and start dosing CO2 again as the vents will be closed.
Scientific Article �Effect of Vent Openings and Insect Screens on Greenhouse Ventilation� :
https://www.researchgate.net/publication/222921589_Effect_of_Vent_Openings_and_Insect_Screens_on_Greenhouse_Ventilation
|
|
|
Sunday, April 21
|
View Page
|
 |
CO2 Controller (Titan Controls Atlas 8) Reading: 1050ppm
After demonstrating the improvements to plant growth that CO2 enrichment can provide this is something that is a key part of plant growing (assuming other conditions are being maximized). This controller is one that is used from day one of planting until the pumpkin is about 30 days old or so. CO2 enrichment does not improve pumpkin growth (probably because they are mostly water) but it does help improve plant and root growth.
The reason why the day 30 pumpkin growth is not a hard date for CO2 removal is because it does not have to do with the pumpkin itself but more of the plant growth. CO2 is beneficial to plant growth so typically around day 30 for the pumpkin, the plant (at least in my case) is near full size (1,000sq.ft.) so the CO2 is no longer needed.
The target level is about 1,100 ppm and in this early part of the season a 50 lb CO2 bottle will last about one month, compared to the main growing season that same bottle set to the same level will only last 7-10 days.
An advantage of this controller is it can sense when power is sent via the cooling thermostat and will go into an idle mode where it will still provide live readings of the CO2 in the area, but not actively add any until the vents and fans turn off. Then it will add CO2 until the target level is reached.
Article About CO2 in Greenhouse production from 1993:
https://hortscans.ces.ncsu.edu/uploads/c/a/carbon_d_52570d1851c70.pdf
|
|
|
Sunday, April 21
|
View Page
|
 |
Supplemental CMH Light (Part 1 of 2)
The green timer is attached to the 315-watt CMH (Ceramic Metal Halide) grow light with a 4200K daylight bulb in it. This comes on at 4am then off at 9am and then back on at 6pm and off at 10pm. This serves two important tasks�
1. It adds light to increase the plants perceived photo period to replicate late June. This not only helps with speeding up the plant growth rate, but also allows the CO2 to be added for a longer period of time since there is a photo sensor on the sensor that will only add CO2 when there is enough light that the plants can use CO2, since it cannot be utilize during the �night� or dark portion of the day.
2. Most growers will wonder why LED lights are not being used, why has a CMH light been selected? This is because CMH will generate more heat and can be spaced higher from the plant to increase coverage area and allow more natural sun to reach the plant when the light is off during the day. The heat is a good thing early in the season and the more heat the better as this can warm the leaf up also increasing the photosynthetic rate making extra use of the elevated CO2 levels. Also, the increase in spacing from light fixture to plant is nice so there is less shade during the day when the sun is out and the artificial light is off.
YouTube Video Link �CMH Lighting Option� : YouTube
|
|
|
Sunday, April 21
|
View Page
|
 |
Supplemental CMH Light Part 2 of 2)
LED lights need to be kept close to the plant to have high PAR (intensity) values and this can cause a shading effect when they are off and the sun is out. Also, the reduced heat they produce is a drawback this time of year as heat is something that is being added anyway so to have it as part of the light, as is the case with the CMH light is an added benefit.
Many will argue that the LED light spectrum is �better� or customizable. To these points, remember this is an outdoor plant that is getting mainly sun and the light is only supplementing light to increase the duration of light exposure. There are some bulb options to get a general spectrum and the 4200K is a daylight/sunlight spectrum.
Also, the customized spectrum sounds great, but the �ideal� light spectrum pattern is not really known so it may feel nice to have dials to adjust, but the adjustments are more of a grower feel good option than increasing plant performance. However, there is active research in this area, so hopefully going forward a more scientific approach to light spectrums and plant performance can be made.
Sure, LED's will be the future, but for now a CMH would be preferred.
YouTube Video Link �CMH Lighting Option� : YouTube
|
|
|
Sunday, April 21
|
View Page
|
 |
Planting Day for the 2287 Sadiq '22
This is only about 11 days after initially filing the seed and it could have gone in a little earlier, but there were some very cold nights recently. Those nights were used to test the system to ensure sufficient heat could be maintained and no failures occurred and no breakers were popped.
Everything passed inspection so now, the seedling is in the ground with all the special environmental additions as well.
This is a little more efficient method of seedling planting�
YouTube
|
|
|
Sunday, April 21
|
View Page
|
 |
CO2 Sensor and Heater Placement Around the 2287 Sadiq '22
Here the placement of the reptile heat lamps and the CO2 sensor can be seen. The triangle of heaters ensures all angle are covered along with the air temperature sensor being placed in the middle and above the plant. Out of the image is a small fan to keep air circulation which is both important for the heat but also the CO2.
Above the plant is where the CMH light is located but it is off at this time. Also, the weed block helps reduce the need for weeding and keeps soil moisture retained but still allows for air exchange.
Carbon Dioxide Sensor Placement Options: YouTube
|
|
|
Sunday, April 21
|
View Page
|
 |
Full Set-up Daytime Image: 2287 Sadiq '22
This provides a general overview of the support system around the seedling so while there may be a lot going on (see previous posts for details) everything serves a purpose and is part of a complete system to maximize efficiencies and plant growth.
The large black cord that seems to be in the middle of the image is going to the CMH light that is located directly above the seedling to help add some heat and increase the photoperiod.
While it may not be as intense as a grow tent set-up this shows how detailed it could get :
https://hydrobuilder.com/learn/grow-tent-setup-guide/
|
|
|
Sunday, April 21
|
View Page
|
 |
Full Set-up Nighttime Image: 2287 Sadiq '22
This is the same set-up and general camera angle as the previous entry, but it shows the light coverage area. While the seedling is small at this early stage, the light is set-up so the plant as it vines will still be exposed to the high intensity light. The CO2 sensor is also kept near by since it has a photosensor so the goal is to ensure the CO2 is being added when the plant can photosynthesize.
Article Link �Determining Grow Light Position Using a PAR Meter� :
https://www.apogeeinstruments.com/blog/determining-grow-light-position-using-a-par-meter/
|
|
|
Sunday, April 21
|
View Page
|
 |
Night Time Extra Coverage
To help keep as much heat trapped inside the structure as possible and two old boat tarps are used to cover the cold frame to help act as a thermal barrier. Blankets will also be put on first and then the tarp to really help minimize the potential heat loss.
These are removed in the morning to allow natural sun to be exposed to the plant when the artificial light is off and cooling becomes a greater concern.
While there are different greenhouse covering material to consider with the light transmission and U-values, the simple boat tarp is easily available and does the job that is needed. However, the link below shows some of the details on the different options available.
Article Link � Energy Efficient in Greenhouses�:
https://farm-energy.extension.org/wp-content/uploads/2019/04/2.-A3907-01.pdf
|
|
|
Monday, April 29
|
View Page
|
 |
Night Time Temperature Readings
At night due to the longer exposure time, it is a little easier to capture the numbers on the thermostats so this shows�
�Jump Start� = Soil Temperature of 71.4F (21.9C)
�Hydrofarm� = Air Temperature of 73.4F (23C)
These are right around the target levels so all is good here.
22C (71.6F) Night time temperature seems to offer the highest yields in this cucumber study
https://www.researchgate.net/publication/308885563_Night_time_temperature_and_day_time_irradiance_on_photosynthesis_and_growth_of_cucumber_Potential_and_possibilities_for_energy_saving
|
|
|
Monday, April 29
|
View Page
|
 |
CO2 Reading
With the target of 1,100ppm of CO2 seeing the live readout at 1,091ppm is demonstrating that everything is in the target range. Even though it is dark outside, with the artificial light running the CO2 will continue to be added as the sensor knows the plant can photosynthesize therefore it can actually use and benefit from the CO2 addition.
Article About Carbon Dioxide Supplementation:
https://extension.okstate.edu/fact-sheets/greenhouse-carbon-dioxide-supplementation.html
|
|
|
Monday, April 29
|
View Page
|
 |
Iron Deficiency: 2287 Sadiq '22
Just like last year this is another image what an iron deficiency looks like in a giant pumpkin plant. This image was taken at night under the artificial light as it shows the color distinction better.
Iron deficiency is evident by the newer growth turning a faint green to yellow in extreme cases. This was identified early so iron fertilizer was added to lessen the extreme case that this would show.
Last year the plant was a more advanced deficiency�
http://www.bigpumpkins.com/Diary/DiaryViewOne.asp?eid=339841
Recognizing and Treating Iron deficiency:
https://extension.arizona.edu/sites/extension.arizona.edu/files/pubs/az1415.pdf
|
|
|
Friday, May 10
|
View Page
|
 |
Biomin Iron (Rate 1oz. per gallon) to Correct Deficiency
While there are many different types of Iron fertilizers the Biomin line uses and amino acid to help increase the amount of the nutrient that is plant available. For many of the micronutrients this is important as they are needed in small amounts but can often be a challenge to get the plant to uptake. Having this form allows for directed applications to be readily absorbed by the plant to help reduce the duration of a deficiency.
Typically, when a deficiency is seen in a plant it will take multiple applications of the deficient nutrient to correct the issue. This is so the risk of plant damage is minimized and to help the plant continually pick-up some of the nutrient. This also provides the grower the ability to make changes based on the plant response to avoid the chance from going from deficiency to toxicity.
There were a total of six Biomin Iron applications made at the rate of 1oz. per gallon. The following dates correlate with the six applications� April 20th, April 27th, April 29th, May 1st, May 3rd, May 6th
Once the deficiency was corrected the plant did not need any more applications based on the visual appearance of the leaves. So, in this case it was simply an early season only issue. So, directed applications at this critical time can help the plant tremendously later in the season.
Iron Fertilizer Sources:
https://extension.okstate.edu/fact-sheets/identifying-and-correcting-iron-deficiencies-in-ornamentals.html
|
|
|
Sunday, May 12
|
View Page
|
 |
2287 Sadiq '22 Starting to Vine Out
This shows the plant on the ground and running. What is key is that the secondaries are also starting to stretch out and it looks like the ratio of the main vine to the side vines is matching what was predicted when it came to planning this cold frame.
The main vines does grow on weed block that that is unrolled as the vine grows. This is a thinner material than the darker material that has the blue strips on it. Even though it is not as thick and tough it is intended to be only used for a season and does a good job of blocking the weeds. While blocking the weeds is great, so is the soil to vine separation that occurs and it also provides a great way to easily check the main vine during the season.
Effect of Plastic Mulch on Growth and Yield of Chilli :
https://web.archive.org/web/20180729010845id_/http://www.scielo.br/pdf/babt/v54n2/v54n2a14.pdf
|
|
|
Sunday, May 12
|
View Page
|
 |
Passive Intake Vent on Cold Frame
This show the passive vent that is connected to a thermostat set to open when the inside temperature reaches 86F (30C). At the same time the exhaust fan (seen in the distance) is also turned on allowing for air to be pulled through the structure. The CMH lights are also placed in this direct air flow to keep them cool if needed, but often they are not on during the heat of the day.
The thermostat not only turns on the vent and fan, but at the same time the CO2 controller will go into stand-by mode. This is a great feature as it not only saves the dosing of CO2 when air is being vented out, but it will still monitor current CO2 levels. If air circulation is not sufficient around the plant there will be a reading of less than 400ppm so checking on the CO2 level during the heat of the day is another way to monitor environmental conditions and make adjustments if needed.
A Review of Ventilation and Cooling Technologies in Agricultural Greenhouse Application :
https://www.ijee.net/article_64325_ed4445b59a403b945cb9d541465c6a5f.pdf
|
|
|
Saturday, May 18
|
View Page
|
 |
2287 Sadiq '22 Has Outgrown The Cold Frame
The 8ft wide by 12ft long (and 6ft tall) structure is the ideal ratio as when the main vine hits the end of the cold frame so did the secondary vines. The plant was held in for a day or two longer than ideal, due to the cold nights and the ease of being able to heat and monitor the smaller area.
However, today is the day the cold frame needs to come down so the plant can be properly buried and prepared for the Christmas tree/ Box style of pruning that will be used as the plant fills the growing area.
With the CMH lights on the advantage of using two 315watt lights compared to one 630watt lights is better coverage area. Each light is on a light hanger so its height and horizontal spacing can easily be adjusted. Each will cover about 4ft. x 4ft square of plant area. These are again sized to properly fit in the cold frame to maximize the growing area optimization.
There are different bulb options and since these are more of a supplemental light and not relied on to actual grow the plant under the exact spectrum is less of an exact concern since the plant will receive mostly natural sunlight. However, the sunlight bulb (4200K) is what is selected for its higher blue spectrum to reduce the tendency of the plant to stretch and to replicate the spectrum it will be naturally receiving anyway.
630 and 315 watt CMH Review : YouTube
|
|
|
Saturday, May 18
|
View Page
|
 |
2287 Sadiq '22 Secondary Vines Climbing the Walls
This shows that the plant could have been removed a few days earlier but it was held in here a little longer due to the cold nights predicted. What this image also shows is the high humidity in this growing space. While plant growth, structure, color and overall performance are all in-line with what would be expected with a competitive plant, humidity is something that growers may need to take into greater consideration. It is not as easy to control as growers may think, but it is a growing environment condition that will be of greater focus this year for sure.
Temperature and leaf wetness can lead to increased disease pressure and also impact growth of the plant. Getting these dialed in is a continual struggle over the growing season due to the ever changing weather and general conditions.
One disease of high concern for Cucurbits is Downy Mildew, for which there are different strains that can impact different members of the cucurbit family with varying severity. It is of the greatest concern to cucumber growers, but here is a study showing how temperature and leaf wetness impact the sporangia germination and infection of Cucurbits�
Interactive Effects of Temperature and Leaf Wetness Duration on Sporangia Germination and Infection of Cucurbit Hosts by Pseudoperonospora cubensis :
https://apsjournals.apsnet.org/doi/epdf/10.1094/PDIS-07-11-0560
|
|
|
Saturday, May 18
|
View Page
|
 |
Cold Frame Basic Design and the 2287 Sadiq '22
After removing the 6mil main cover the basic supportive structure and plant can be better seen.
The proportions of the plant and the structure are what is needed to maximize space and not have extra (wasted) space when it comes to heating, cooling and enriching with CO2. With the customization of the design, it could have been made larger but once a plant reaches this size it is typically growing exponentially. With the rate of plant growth at this size/age even if the cold frame was made bigger it would not hold the plant for much longer anyway and the controls over the environment would be even more difficult to regulate.
So, this is the ideal size to help the plant get a good early start and not be overly difficult to manage the heating and cooling. If other plants were the selected crop to be grown other dimensions may be ideal, so this is purposely set for giant pumpkins.
These are the fittings used along with regular fence top-rail for the pipes� High Peak Canopy Fittings:
https://canopiesandtarps.com/canopy-fittings.html
|
|
|
Saturday, May 18
|
View Page
|
 |
2287 Sadiq '22 Exhaust Fan End Wall Removed
Removing the structure alone does present a little bit of a challenge and a little stress but this was part of the design features. While the end wall detaches the ridge pipe is attached in a fix location so it cannot fall on the plant. By removing the side pipes the end wall can be cleared from the plant. During the design and development stages of the cold frame this modification was made to help reduce the chance of plant damage.
Selecting the correct size vent and fan is important for the larger and also this smaller structure. It can come down to CFM (Cubic Feet per Minute) with a few considerations to take into account. For this purpose, a 24� shutter vent and a 16� fan were selected. The fan had three speeds, but needed to only be run on the slowest speed as everything seemed to be calculated to work out well.
Here is a link to a Greenhouse Fan Size Calculator :
https://www.acfgreenhouses.com/greenhouse-fan-calculator.aspx
|
|
|
Saturday, May 18
|
View Page
|
 |
2287 Sadiq '22 With Cold Frame Fully Removed
While there may still need to be some details completed, this shows the cold frame structure fully removed and the plant ready to fill its new growing area. The lights have been transferred from the cold frame to a 10ft metal pipe that is attached to the larger hoops of the hoop house which can be also be adjusted with light hangers. (The pipe can move and so can the lights on the pipe.) Having these still over the plant allow for a lengthening of the photoperiod and also DLI (Daily Light Integral) but despite these being official grow lights they still do not cover that much are with high intensity light.
The goal is to make the plant think that it is more like Jume 18th and not May 18th when it comes to the duration of light the plant is receiving.
Daily Light Integral (DLI) : YouTube
|
|
|
Tuesday, May 21
|
View Page
|
 |
Vine Burying
When it comes to vine burying the process is best kept simple. As the secondary vine grows out about 2ft. (60cm) the vine is lifted and then a shallow trench is dug under it that the vine will lay in. It is about 3 inches (7.5cm) deep so the vine can be covered with enough of the soil that was removed to create the trench so the top node is covered where the root will form. Blocking the light and keeping the area moist can help encourage the roots to form, but adding a rooting hormone can help this process along as well.
However, before burying the vine, the tendrils are kinked/broken if needed, and CloneX gel is applied (*Not sponsored by CloneX) to both the top and bottom are where the root will first start to grow from. This is a rooting hormone that will help encourage the initiation of the root and also help the root to branch once it starts growing to help increase the surface area of the root.
A small paint brush is used to apply a large drop on the root nodes that can be seen in the image. CloneX is used for its ease of application, effective results and the fact that one 250ml bottle will do a full sized (1,000sq.ft. plant) for the season.
It may take a little extra time, but in the end it is worth it.
CloneX does contain Indole Butyric Acid (IBA) as its main active ingredient�
Indole-3-butyric acid in plants: occurrence, synthesis, metabolism and transport :
https://onlinelibrary.wiley.com/doi/abs/10.1111/j.1399-3054.1993.tb05513.x
|
|
|
Tuesday, May 21
|
View Page
|
 |
Rooting Hormone Comparison
While this may be from a pervious growing season it shows the difference that a node that has had CloneX gel (*Not sponsored by CloneX) applied compared to one that has not had it applied look after a short period of time.
The key is the quicker rooting and also the increase in branching which helps with the surface area to volume ratio leading to improved water and nutrient absorption.
This image shows a vine that was not left long enough to have the top root start to form, but this is intended to show the speed of rooting and the increase in branching that does occur.
Here is how the main ingredient (Indole Butyric Acid (IBA) impact tomato cuttings�
Effect of Indole Butyric Acid (IBA) on Early Root Formation(Tomato �Sahil� Hybrid) Cuttings :
https://www.jmaterenvironsci.com/Document/vol6/vol6_N1/33-JMES-1311-2014-Waheed.pdf
|
|
|
Tuesday, May 21
|
View Page
|
 |
Effectiveness of Rooting Hormone
This section the vine lifted slightly which allows for a great view of the branching of the bottom root, but also the top root also has developed enough to reach the soil as well. When the vine is buried and parallel with the ground the top root does not have as far to travel before it finds the soil. While this image shows a �not ideal situation� still demonstrates that the method of adding a rooting hormone can be effective.
Exogenous auxin improves root morphology and restores growth of grafted cucumber seedlings:
https://www.researchgate.net/profile/Astrit-Balliu/publication/316895757_Exogenous_auxin_improves_root_morphology_and_restores_growth_of_grafted_cucumber_seedlings/links/59194d65aca27200fe52fb1f/Exogenous-auxin-improves-root-morphology-and-restores-growth-of-grafted-cucumber-seedlings.pdf?_sg%5B0%5D=started_experiment_milestone&origin=journalDetail
|
|
|
Monday, May 27
|
View Page
|
 |
Soil Moisture Sensors (WaterScout SM100)
There are many options when it comes to monitoring equipment and as growers looking at the options and making a decision on what will work best in their situation is important. For some it may be the features for others remote connection may be important, but regardless of what is selected the proper set-up is a very important step that is often over looked. When using a device to guide other decisions it is important to get accurate and repeatable data.
Inaccurate data is worse than no data at all. So, ensuring the proper set-up protocol is followed to provide not only accurate results but ones that are repeatable season to season.
The Spectrum Technologies WaterScout SM100 sensors and data logger is the combination selected for soil moisture monitoring. This is a professional set-up that is about 6+ years old and has only needed battery replacements over this time.
WaterScout SM100 : YouTube
|
|
|
Monday, May 27
|
View Page
|
 |
Consistent Sensor Depth (About 6 inches or 15cm)
Since three soil moisture sensors will be placed around this plant it is important that each is at the same depth so fair comparisons can be made. While the exact depth is open for some debate 6 inches (15cm) was selected as this marks a good depth of the same growing substrate/compost mix.
Also since drip tape is the main source of irrigation the sensors are also installed half way between the lines. In addition, there will also be a tall bamboo stake placed near the spot the sensor is buried to not only make it easier to find but to know where the data is coming from.
WaterScout SM100 Sensors
https://www.specmeters.com/brands/waterscout/sm100/
|
|
|
Monday, May 27
|
View Page
|
 |
Sensor Installation
The proper method of installation is important and while it may not seem like there is much to it or how many different ways can there be, but there are actually many options. However, the correct procedure is to cut the soil profile and insert the probe in undisturbed soil so the sensor surface is vertical to avoid water accumulation which could lead to a false reading. Also, making sure the cord is also horizontal will help avoid water from running down the cord to again provide a false reading. It is this attention to detail that many growers neglect to take into consideration as they only want to look at the resulting numbers. But if these steps are not followed, the reading may not be accurate.
There is also a brown bamboo stake on the right-hand side (more on that in the next post).
Also, many growers may not realize exactly how water moves through a soil profile so here is a video that shows a Sand loam, Loam and clay loam soil profile and how water moves through it over time�
How Water Travels Through a Soil Profile : YouTube
|
|
|
Monday, May 27
|
View Page
|
 |
Soil Moisture Sensors Placement Marked
There are multiple reasons for the large bamboo stakes marking the exact placement of the soil moisture sensors�
1.) To know exactly where they are so they are easy to locate if needed
2.) As the plant grows out and over the areas the location of the data can easily be identified
3.) If there is a problem there will not need to be any searching for the location
4.) Comparisons of the plant to readouts can be easily be made
*It is important to also let the sensors sit for a period of time (about a week) before taking readings. The reason for this is the soil has been disturbed so letting everything settle and saturate is important to ensure reliable and consistent readings that can be used as a comparison.
The colors match the colors on the data logging box so having a redundant system to ensure the location of the readings is important. The locations were carefully selected to ensure maximum spacing between each so there is not a chance of interference from one sensor to another.
Also, the orange one is in the older portions of the plant, the green one is near the pumpkin and the brown one is in the younger plant material. This way different sections of plant age can be compared during the growing season. The drip tapes each have independent valves so custom adjustments can be made if needed.
If you want more information than you may think is possible so placing soil sensors here is an article� Impact of sensor placement in soil water estimation: A real-case study :
https://www.researchgate.net/publication/359227874_Impact_of_sensor_placement_in_soil_water_estimation_A_real-case_study
|
|
|
Monday, May 27
|
View Page
|
 |
2287 Sadiq '22 Plant Overview
The umbrella is shading the early female flowers that may be a potential keeper. By providing early shade this reduce the chance of the main vine tip burning or the early female flower development from having heat related damage. Since the flowers does a lot of differentiation and development on the cellular level even before it opens for pollen, the protection before the flower opens is important. This may help reduce the chance of aborts.
Many growers only start to offer protection on pollination day and beyond, but the early protection is also important and the umbrella method is quick and easy. It can also be moved if a flower further down the vine is the new chosen one. However, if you are growing outside make sure it is on a sturdy stake so the wind can not damage this critical area of the plant. How strong of a stake?... Strong enough so the fabric of the umbrella would tear before the stake breaks, so metal stakes it is😉
The area is 32ft. wide and the plant can grow about 35ft. long (structure is 40ft. long). The black weed block fabric is porous so it can allow water to drain through it, but it also helps hold in soil moisture and is does save a lot of work not early season weeding. Once the plant grows out the material is rolled back and then the shade of the leaves also will suppress weed formation.
The black lines/cords are one of three things� (each described in more detail on the next post)�
1.) CO2 Rain Tubing
2.) CO2 Sensor
3.) Humidity Sensor
While this is intended for indoor operations this explains the rain tubing�
Using Rain Tubing for Carbon Dioxide Delivery : YouTube
|
|
|
Monday, May 27
|
View Page
|
 |
Mid-day Readings May 27th, 2024
This just shows a point in time reading in the middle portion of the day. The �Acurite� reader does log the min and max humidity and temperature over the last 24-hours but placement can be a challenge especially when the sun is out. (Cloudy days it is more accurate.)
The CO2 control does only read 449ppm, because the fan has been on and the system is in idle mode so it is still providing readings, but no active dosing at this time. Once the fan turns off and the vents close the system will go back to active dosing while it is light out to reach the target of 1,100 ppm.
Humidity = 60% (Range 43%-99%)
Temperature = 88F (Range 68F-93F)
To get these readings there are three key components�
1.) CO2 Rain Tubing- 1/8� black tubing with a pin hole every 12� that forms a 100ft. loop where the CO2 is injected on the ground. Since most of the stomata are on the underside of the leaves.
2.) CO2 Sensor- The cord is 15ft. long so it is placed as close to the plant but there is a gap since the plant is small. However, it still provides accurate readings especially since CO2 is heavier than air so it will drift to the plant anyway. The use of fans does help avoid high CO2 pockets as well.
3.) Humidity Sensor- The sensor is directly below the CO2 one so the same physical location is where the data is all coming from for now.
Full control over all conditions is not possible, the conditions provided here are in the target ranges. (Under �ideal� conditions the minimum humidity level would be raised by about 10%.)
This article stresses the importance of water when it comes to cucurbits dealing with heat stress�
Effect of climate change on the production of Cucurbitaceae species in North African countries :
https://www.researchgate.net publication/373051566_Effect_of_climate_change_on_the_production_of_Cucurbitaceae_species_in_North_African_countries
|
|
|
Sunday, June 2
|
View Page
|
 |
Irrigation: Incoming Water Complete Set-up
In the image there is one main water line coming in and then it is split into two separate lines each with a DIG timer. In short one is connected to the drip tapes early in the season and once removed the other one becomes active to fill the irrigation water tank.
While the two timers each have a different intended purpose for their current use either is working out just fine, but you can check out each with the manuals provided below and see the next post on how each is being used.
710A : https://www.digcorp.com/professional-irrigation-products/710a-series-battery-operated-controller/
710AP : https://www.digcorp.com/professional-irrigation-products/710ap-series-battery-operated-propagation-controller/
|
|
|
Sunday, June 2
|
View Page
|
 |
Irrigation: Timers
The left-hand splitter goes to a Y-splitter with one hose (marked in orange) going to a �live� as needed hose for when water is needed �now� for whatever reason. The other splitter goes to a 10psi pressure reducer and then a DIG 710A timer. This is a standard timer (compared to the other one) and uses regular city water to irrigate the entire hoop house early in the season until about pollination time. The reason for irrigation of the full structure is when areas are not irrigated the soil and peat (that was added earlier in the season) can become hydrophobic and present many challenges to rewet. So, this timer is connected directly to the drip tapes and is used from the time the structure goes up until about pumpkin pollination time (since no fertilizers are added during this time).
The right-hand slide goes to a DIG 710AP timer is technically a propagation timer so it has some different features beneficial to growers propagating plants which means is has a repeat cycle function. However, when originally purchased this was used to control the mist system, but this proved to be inefficient so there is a new system installed (more on this later) that is fed via the orange and white black hose that can be seen in the lower right corner. The timer now does not connect to the drip tapes, but to the 275-gallon water tank and this timer is responsible for filling the tank.
Having each timer dedicated to one task may seem a bit odd, but this was used originally for a slightly different irrigation set-up but has now been repurposed to this current and more efficient configuration. Also, it does offer the advantage that if a timer was to fail in-season a quick hose change and reprogram of the other timer can have the system back to normal in about 10min. so there is not plant irrigation interruptions as the issue is analyzed and corrected.
DIG Controller Model Comparison : https://www.digcorp.com/controller-comparison/
|
|
|
Sunday, June 2
|
View Page
|
 |
Irrigation: Outgoing Water
Here is the irrigation system that connected directly to the drip tapes and is used basically right around pollination time until the end of the season. Reason for this time frame is this is when fertilizers will be added and this tank-based system makes this process easier.
First off, this set-up is sitting on a 275-gallon water tank and there is a tarp over the area to help keep it shaded, relatively cool and protected from the direct rain.
The large pump is a 1hp Wayne Water pump (Model #PLS100) which has an intake hose with a foot valve going into the tank.
Above the tank is a BACO-ENG 1� Electrical Ball Valve that is normally closed and when power is added it will open. This had to be added since even though the pump would turn off, slowly over the day water would syphon out and over water the plants.
Both the water pump and valve are connected to a Woods 50015WD Outdoor Digital Timer. This has two outlets so the pump and valve are both controlled at the same time.
Wayne Water Pump Manual : https://www.waynepumps.com/wp-content/uploads/woocommerce_uploads/2018/10/PLS100_650001-001-B_Web.pdf
|
|
|
Sunday, June 2
|
View Page
|
 |
Pumpkin Irrigation Set-Up
Then above the valve is a T-fitting so two plants can be irrigated at the same time, but this year only one plant is being grown so just one side is being used. However, each side has a 10psi pressure reducer and then a 200-mesh stainless steel filer before going out to the drip tapes.
The 3-way electrical splitter in the center that seems to be floating is where the timer is connected, but the reason for this addition is there is also a white on/off switch that has a cord plugged into it which goes to a regular fish tank water pump that is in the tank all the time. To help mix in whatever is added to the tank, this pump is turned on to start stirring the tank, then the product is added and the pump runs to help ensure even distribution. Then it is turned off so when the main pump come on it is an even dosing of the product over the irrigation event with no take settling of product.
However, there is one empty outlet� This is where the BlueLabs Guardian water monitor is plugged into when the nutrients are added to ensure the concentration and pH are dialed in. This is only used during the active mixing process as this is stored inside so it is only added at the point of mixing to be sure the proper feed is delivered to the plants.
*What is present but cannot be seen in this image is a Jobe Rojo Float Valve that has a float on it that will prevent the tank from overfilling if the valve is to fail in the open position. This will prevent the water from running all day and over filling the water tank so it is a good fail safe to have in place.
Irrigation frequency and amount affect yield and quality of field-grown melon (Cucumis melo L.). :
https://tinyurl.com/bdze72a9
|
|
|
Sunday, June 2
|
View Page
|
 |
275-Gallon Galvanized Steel Panels Water Tank
While 275-gallon water toes are common, if this style can be found this is the one to get. It is a little more expensive since it is completely wrapped in metal which is because it was originally used to transport isopropyl alcohol and the warping is to help avoid light degradation of the product during delivery. As a result these can become �forever� tanks, even when kept outdoors.
From a pumpkin grower's standpoint this offers two advances, the alcohol essentially evaporates so there is no residual in the tank. Most other tanks are marketed as food grade transporters, but this often means oils were used and while food grade, there is will be a long-lasting residue. The light block the metal does prevent the plastic tank inside from degrading in the sun and it also prevents algae from growing with technically no need for any covers. This is covered with a tarp to shade the pump and equipment on top of the tank.
The black arrow indicated 132gallons which is considered �full� when one plant is being grown. About 100gallons will be irrigated and then refilled via the timers seen in previous posts.
Here is what the tank essentially is : https://smithsofthedean.co.uk/product/ibc-tank-1000-litre-new-galvanized/
|
|
|
Sunday, June 2
|
View Page
|
 |
Complete Misting System Components
In the past a repeat cycle timer had been used which is commonly for propagation where newly rooting cuttings need the additional humidity to reduce the chance of desiccation and leaf wilt/burning. The downfall noticed with this system is the weather is different and ever changing so if the on/off cycle period is dialed in for one day the next it would either not be enough or excessive the following day. This system has a controller so it can react to the ever changing environment and at least ensure the humidity does not dip below a pre-set minimum.
The Components:
1.) TrolMaster Beta-6 Controller: This has proven to be a great controller that can handle the outdoor environment for multiple seasons. It is easy to set-up and make adjustments and also provides continuous �live� readouts of the current conditions. With any system it may take a little time to figure out the best sensor placement but the unit itself has been great.
2.) Homenote Misting System: This is a 92ft. (28m) misting line with 26 Brass misting nozzles in the white color to try and keep the water as cool as possible.
3.) Homenote Brass Misting Nozzle Plugs: While all of the above equipment is the fun and interesting components, this is a critical part that should also be purchased. It seems the spacing of the nozzles from the stock system are a little close so selectively blocking some of them can ensure the increase in humidity, but not excessively watering the plant area.
Digital Day / Night Humidity Controller : https://www.trolmaster.com/Products/Details/BETA-6
|
|
|
Sunday, June 2
|
View Page
|
 |
Critical Humidity/Misting Components
While the white fitting is the actual misting nozzle and is important, do not underestimate the importance of the brass plugs as well. The set-up around the plant will be shown and it is recommended on the initial installation to run all of the nozzles to get an idea of the maximum distribution of mist.
However, there will likely be areas that seem to be excessively watered and could be potential sites of disease development so it is a quick and easy change out from the misting nozzle to the plug�. If you have the plugs on hand. So, be sure to get some of the plugs as it is much easier to block misting fittings than to add them to the system.
Similar Misting System : https://www.holmanindustries.com.au/wp-content/uploads/MK21013-7m-Misting-Kit-Manual.pdf
|
|
|
Sunday, June 2
|
View Page
|
 |
TrolMaster Beta-6 Controller:
This is the brains of the misting system that has a sensor placed at the plant site to ensure the reading is coming from the plant and not the location of the sensor which is away from the plant and in a shaded location.
The current �live� reading is 64.0% humidity. The controller is set to come on at about 57% as this seems to be the correct setting after letting the system run for a few days. The scientific target according to the research papers seems to be a minimum of 60% so this is not far off.
This is connected to a BACO-ENG �� Electrical Ball Valve that is normally off. When the controller senses that the humidity has dropped below the target level it will open the valve which will activate the misting system that is connected to a �live� hose. This will remain on until the humidity is at the target level and then it is turned off. This means the system can come on when it needs to and stay off when not needed. Compared to a cycle timer that will come on and off regardless of conditions has helped better regulate the growing environment.
While there is a 200-mesh particulate filter, if the feeding water is hard or high in salts a pre-filter would be recommended to avoid clogging the very small and fine mist nozzles.
TrolMaster Beta-6 Controller Manual :
https://www.trolmaster.com/PDFHtml/BETA-6.html
|
|
|
Sunday, June 2
|
View Page
|
 |
Misting System In Action
It is hard to capture the mist since it is so fine as the real goal is to just increase the humidity in the air and not nessiraily get the plant leaves wet, but it happens. If a true fogger was used this would produce an even finer mist but the set-up is more intensive and the overall plant benefit is not much more than what this simple system produces, so the fogger route could not be justified. A little leaf wetness is not bad and can actually be a benefit for the newly growing vine tips to reduce the chance of burning.
If you look in about the 12 o'clock position there is another mister on that shows the coverage of the mist a little better because of the shade line compared to the obvious one in the foreground. The plant has not reached this area, but the goal is to increase the humidity of the general growing space so the mist does not have to come into direct contact with the leaves to be effective.
Sprinkler System Design Guide : https://www.netafimusa.com/bynder/A7CE490A-FDD3-4CF0-BCE27E80CBA1EE49-sprinkler-design-guide.pdf
|
|
|
Sunday, June 2
|
View Page
|
 |
Misting Set-up (and more;-)
Around the premier of the plant about 6ft (2m) up the white misting tubing can be seen. This wraps in a U-shape around the plant with the area where the images was taken from not having misters. The large exhaust fan is on this side so they would be less effective and the goal is to have the mist generated on the perimeter and be drafted to the center and toward the cameras position to help increase the humidity/mist coverage using minimal water.
The important plugs are installed in the center portion so the lights do not get any direct mist on them (even though these are off during the day) and also plugs are placed as needed in the 96ft (30m) of tubing around the plant. It generally averages out to about every other mister being purposely plugged. So, of the 26 misting sites there are about 12 plugs used so be sure to purchase some extras.
�and more
In the lower corners fans can be seen (more details on the next post) these are important to ensure under canopy air movement. This is needed since this is a hoop house structure with the only air flow (at the moment) being the vents so the corners and under leaf area can easily become stagnate.
Keeping air moving is important in general but this will also help with distribution of the CO2 that is being added.
Ventilation in Greenhouses : https://www.dpi.nsw.gov.au/agriculture/horticulture/greenhouse/structures-and-technology/ventilation
|
|
|
Sunday, June 2
|
View Page
|
 |
Under Plant Air Circulation �Henry Fans�
I call these �Henry Fans� since �Henry-the giant pumpkin grower� from Massachusetts here on bigpumpkins.com recommended them to me. They have worked out great which is why it is great to reach out to the giant pumpkin growing community as they know the unique purposes these plants take to grow so when something comes recommended it has a high rate of success.
Reading all of the different fan styles, hp ratings, features can get a bit confusing but these are ideal for under canopy air circulation.
These carpet drying / blower style fans not only move a lot of air, but are very stable and low profile so they can easily be placed under the leaf canopy.
There are three settings and 1/4hp and they only need to be run on the lowest setting and work out great. There is still a breeze felt about 20ft away (assuming you have good weed control) so the under-canopy air movement is ideal.
Lastly, they are daisy chainable so the number of extension cords needed can be kept to a minimal.
B-Air Vent VP-25 Manual : https://images.thdstatic.com/catalog/pdfImages/90/90f51cc9-f50e-4ef4-9b3b-9dc450456fec.pdf
|
|
|
Sunday, June 2
|
View Page
|
 |
�Henry Fans� In Action
This shows the placement of the fans to ensure air is getting under the canopy. Remember to keep the side open as this is the inlet for the air. In addition, the fan is placed on a small board to help with leveling if needed and to create a separation between the fan and the soil and drip tape.
Evaluation of ventilation performance and energy efficiency of greenhouse fans :
https://www.researchgate.net/profile/Richard_Gates/publication/275409742_Evaluation_of_ventilation_performance_and_energy_efficiency_of_greenhouse_fans/links/553bfb960cf2c415bb0b16db.pdf
|
|
|
Monday, June 3
|
View Page
|
 |
Road Trip for 2365 Wolf '21 Pollen
While a self-cross is always an option after reaching out to a few growers and finding out that Ron Wallace himself was growing a 2365 Wolf this would make for a great cross at least on paper. When I reached out to him the day before my female flower was going to open to learn he had some pollen he would not need, getting in the car and driving was the next logical step.
Thanks Ron for the pollen and quick patch tour!
There are still a lot of things that need to come together, but this is part of the process so hopefully the plan comes together.
Effects of Long Distance Transportation on Honey Bee Physiology : https://onlinelibrary.wiley.com/doi/epdf/10.1155/2012/193029
|
|
|
Monday, June 3
|
View Page
|
 |
2365 Wolf '21 Male Flower Transporter
It may seem easy, just bring the flowers home, but when traveling and the goal to keep the flowers in water while also reducing the chance of tipping over can be quite a challenge. This stacking container system proved effective and ensured no damage to the flowers.
The outside is a standard 5-gallon pail and then progressively smaller buckets are placed inside until the final water pitcher is the inner most container that contains the water and male flowers.
This is a rare, valuable and delicate cargo so care must be taken to ensure it is not damaged.
Pollen transport differs among bees and flies in a human-modified landscape : https://onlinelibrary.wiley.com/doi/epdf/10.1111/j.1472-4642.2011.00757.x
|
|
|
Tuesday, June 4
|
View Page
|
 |
2365 Wolf '21 Male Flower in the Morning Sun
Upon arriving home with the flowers from Ron's the water pitcher is placed in a window even though it was dark out. Then the flowers are exposed to the natural rising of the sun in the morning. While they often to do not full open, typically they will at least start to open with this method. This window does get the first sun of the morning.
Overall, this is just a nice image😉
Pollination Problems of Cucurbits :
https://www.missouribotanicalgarden.org/gardens-gardening/your-garden/help-for-the-home-gardener/advice-tips-resources/insects-pests-and-problems/environmental/pollination/pollination-problems-of-cucurbits
|
|
|
Tuesday, June 4
|
View Page
|
 |
Warming the 2365 Wolf '21 Male Flowers
When the flowers start to open in the morning sun it is a welcomed sight. However, the anther of the flower (male structure containing the pollen) is evaluated to see how fluffy the pollen is. Often (due to work) the pollen has to transferred before the flower warms up in the sun so a little heat from the hair drier can help this process.
It is important not to blast the pollen with high heat and air velocity. The goal is to just warm the pollen up so heating the pollen involves indirectly heating the pollen. Moving it so warm air is in and around the male flowers is key so the pollen does not dry out.
Often this takes only 2-3min. and when the pollen grains can be seen on the surface and sticking out this is all you need. Just a little way to help hopefully increase the odds of a successful pollination.
The Effect of High Temperature on Pollen Tube Growth of Snake Melon and Cucumber : https://www.researchgate.net/publication/362787974_The_Effect_of_High_Temperature_on_Pollen_Tube_Growth_of_Snake_Melon_and_Cucumber1
|
|
|
Tuesday, June 4
|
View Page
|
 |
2365 Wolf '21 Pollen Fluff
This is the pollen fluff that is considered to be ideal. It will allow for easy transfer to the female flowers stigma so this is what you want to see just before pollinating.
The petals are peeled off so there is only the anther and then the goal is to get the pollen on the lower and inner potions of the female flower first. *Remember pollination is an accidental process, the bees are going to the lower center section for the nectar and are accidentally transferring the pollen. It always seems the bees have a high pollination success so this is just replicating nature.
After this section working up to cover the lobes of the female flowers is done, just because there is typically plenty of pollen and from the human perspective it looks good to see all of the pollen everywhere. However, from a botanical perspective start low and centered and work up and out.
*Sorry no publicly available full text could be found for this article only the Abstract�
Effects of pollen-load on fruit yield, seed production and germination in melons, cucumbers and squash : https://www.researchgate.net/publication/288703096_Effects_of_pollen-load_on_fruit_yield_seed_production_and_germination_in_melons_cucumbers_and_squash
|
|
|
Tuesday, June 4
|
View Page
|
 |
Pollen Has Been Transferred
Cross = F: 2287 Sadiq '22 x M: 2365 Wolf '21 (from Ron Wallace)
Date = June 4th, 2024
Distance Out = 20ft.
Number of Secondaries Behind the Pumpkin = 21
Lobes = 4
Lobe Symmetry Rating = 9.5/10 (this is a grower discretion rating, looking at the image you may have a different symmetry rating)
This is a great looking female flower with the lobes being very symmetrical which typically means less odds of issues later with shape. While this is not a guarantee of a perfectly symmetrical pumpkin, lobe symmetry is preferred over lobe asymmetry.
The making of giant pumpkins: how selective breeding changed the phloem of Cucurbita maxima from source to sink : https://onlinelibrary.wiley.com/doi/epdf/10.1111/pce.12502
|
|
|
Tuesday, June 4
|
View Page
|
 |
2287 Sadiq '22 Plant Overview
Here is what the plant looks like on the day of pollination. Pollinating early is great in theory, but this will only be advantageous if the plant is timed correctly. The growing area is about 32ft wide and 35ft. long and there are a few secondary vines that are being terminated and the recently pollinated flower is under the umbrella that is covered with the white sheet. There is also a fan, rodent ultrasonicator to deter any unwanted visitors and a fan. There are also some sheets of plywood out to ensure everything is off the ground and on a flat surface. This also helps with having a place to be on while avoiding soil compaction.
Test To Investigate The Use Of Ultrasound As An Alternative Means Of Repelling And Eradicating Rodents : http://www.iosrjournals.org/iosr-jeee/Papers/Vol10-issue4/Version-3/O010439193.JEEE%20[ZSEP01].pdf
|
|
|
Thursday, June 6
|
View Page
|
 |
Anthesis Application
About 48-hours after pollination �Antheis� was applied to the pumpkin. This is a combination plant hormone spray that is a combination of ethylene and a cytokinin that I went public with back in 2015 after many years of research.
The short summary is that the concentrated hormones are diluted in water and sprayed as a mist on the actual pumpkin 48-hours after pollination. The goal is to not only increase the duration of cell division, but also the rate.
When applied it does seem to have comparatively slower growth until day 37 from a pumpkin that was not sprayed with the hormones. However, the growth is sustained for longer so the long-term benefits are well worth the slightly slower start.
If you are interested in the details here is a full explanation/presentation :
https://drive.google.com/file/d/1seE6LmSlYt1cEgeBsBrHDitukJxSVuz4/view?usp=sharing
|
|
|
Sunday, June 9
|
View Page
|
 |
Extra Pumpkin Protection: 5-gallon paint strainer bag and Sonicators
When the entire season is based on basically one pumpkin everything is done to increase the odds of a successful pollination. So, not only is there a double layer of mill fabric, followed by �� plywood then another double layer of mill fabric under the pumpkin but there is also a white sheet over the site and the pumpkin has a 5-gallon paint strainer bag over it. The mesh of the paint strainer bag offer good air circulation and also some additional shade. In addition, there was a bird that somehow got into the hoop house so this just provides another physical line of defense for the random and unexpected circumstance that may occur.
The two ultra-sonicators ensure that mice do not take any interest in this newly constructed shade structure with one small water filled and potentially tasty pumpkin in the center.
Probably over protection, but over protection is favored compared to under protecting.
*Google Translate can help with this one�
Effect of ultrasonic on mouse behavior and its mechanism in rodent repeller : https://xbzrb.hbu.edu.cn/EN/10.3969/j.issn.1000-1565.2022.05.009
|
|
|
Friday, June 14
|
View Page
|
 |
Day 10 for the (F: 2287 Sadiq x M: 2365 Wolf '21 (from Ron Wallace))
(only a picture no measurements)
*Setting pumpkins up early is important and this one was on track to curl the blossom end under so I have been working on adjusting it. However, despite knowing that at this age the pumpkin shell is about has hard as a hot ball of butter, I had a case of Trace Adkins pinky and nicked the side of the pumpkin. From the pumpkin stand-point it is not bad, but just an example of grower error and really the only error I feel I have made this season. (�So far😉
Interesting Article that says the best pollinations occurred between 6am and 8am
BREEDING BIOLOGY AND EFFECT OF POLLINATORS ON THE FRUIT CHARACTERISTICS OF CUCUMBER (CUCUMIS SATIVUS L.), CUCURBITACEAE
https://www.researchgate.net/profile/Ekeke-Chimezie/publication/331374613_BREEDING_BIOLOGY_AND_EFFECT_OF_POLLINATORS_ON_THE_FRUIT_CHARACTERISTICS_OF_CUCUMBER_CUCUMIS_SATIVUS_L_CUCURBITACEAE/links/5c766c1e92851c69504412b2/BREEDING-BIOLOGY-AND-EFFECT-OF-POLLINATORS-ON-THE-FRUIT-CHARACTERISTICS-OF-CUCUMBER-CUCUMIS-SATIVUS-L-CUCURBITACEAE.pdf
|
|
|
Friday, June 14
|
View Page
|
 |
Chosen One Is Set� Now Fertilizers Can Be Added
Fertilizing the plant will start on day 13 to allow the irrigation set-up to be tested and the plant now having a sink to store the nutrients. This exact day count is not scientifically supported, but typically fertilizer is not added to the water until post pollination.
Up to this point in the season the only fertilizer that has been given was 6 applications of Biomin Iron in late April and Early May for a total of about 15oz total of product actually used or 2.5oz per application.
This is the concept of soil hydroponics with the soil being used the grow the plant and then when it comes to the pumpkin the plant is fed like it is a hydroponic plant where the grower is ideally feeding what it consumes on a daily basis.
Many growers do not believe that no additional fertilizer have been added at this point, however the plant is continually monitored and if a deficiency was noticed fertilizers would be added but the plant looks good so why add something it does not need.
Also, up to this point there has been an emphasis on water both irrigation and humidity. Pumpkins are 92% water so this is important since a pumpkin is basically a large bag of sugar water.
The plant was growing well and had the correct color so no need to push it and risk speed aging the plant. However, with carbon dioxide enrichment the plant should theoretically consumer more nutrients, but seems the soil can supply those without the need of outside intervention.
There are three main staple fertilizers that I use (see following posts). The Biomin Iron and Copper are used as supplements in season. The iron is typically used early in the season due to the deficiency noticed and the copper is used to help ensure good stem health which may be anecdotal, but the commercial pumpkin growers I work with say there is a correlation.
Water %: https://www.universityofcalifornia.edu/news/10-things-you-probably-didnt-know-about-pumpkins
|
|
|
Monday, June 17
|
View Page
|
 |
Nutriculture K-Mag 15-5-30 (plus trace elements)
*Note: The tape is due to a tear in the bag.
Why This Fertilizer?
This fertilizer has a nice ratio of the essential nutrients that are great for what a pumpkin needs. While many would not agree, the phosphorus (middle number) is the maximum I would like to see as this has a tendency to accumulate in the soil and can cause ground water contamination. However, at this ratio, and at the rate it is added (next post) the accumulation is kept to a minimum. The increased ratio of potassium is great and why it is added at this point in the growing season. The plant itself does not need much potassium, but the pumpkin is a heavy potassium sink. Since this is a nutrient that can easily leach adding it early in the season should not be the only addition. The pre-plant application is to ensure good baseline soil potassium level, but now when demand increases it should be added. (Again, as part of the soil-hydro concept.)
Tech Sheet : http://www.plantmarvel.com/wp-content/uploads/2017/07/Tech-Sheet-15-5-30-K-Mag.pdf
|
|
|
Monday, June 17
|
View Page
|
 |
Nutriculture K-Mag 15-5-30 (plus trace elements)
Suggested Rates:
*Assuming the starting water is�70ppm (on the 700 scale) or 0.1 EC and has a pH of 6.8
Add 1/3 to � cup of Nutricultuire K-Mag and 1 TBS Solubor Boron to 132 gallons of water to create a 380ppm or 0.6 EC and pH = 7.1
The reason for the range of 1/3 to � is that this fertilizer has a tendency to absorb a little water from the air and form into a solid block. So, take a � cup measuring cup and put some pieces of fertilizer into it and when it reaches the top with some air pockets due to the large chunks, you are good to go.
The Solubor serves two purposes, the first and obvious one is to add some boron. This is not much but typically in the past soil and tissue tests have shown low levels so this small addition does seem to help keep Boron levels in the target range. However, the second reason for the addition is to help increase the pH of the otherwise acidic conditions of the K-Mag fertilizer. Solubore alone has a pH of 8.5 so by adding it there is more Boron in the mix, and the pH is adjusted to near neutral so it is a great double benefit.
K-Mag SDS Sheet : http://www.plantmarvel.com/wp-content/uploads/2017/07/15-5-30-K-Mag-SDS.pdf
|
|
|
Tuesday, June 18
|
View Page
|
 |
Botanicare Cal-Mag Plus 2-0-0
Having a calcium product is important in the fertilizer line-up, especially for pumpkins. While pumpkins are heavy consumers of potassium, calcium is also a positive ion so there is a competition in the soil profile and absorption by the roots. This is why it is important not to over fertilize with one nutrient because it can block the absorption of another. While tomatoes are known for blossom end rot, blossom end splits could be encouraged by poor calcium levels. While the majority are probably genetic related, it does seem that in pumpkins that some splits could have a nutrition correlation.
This is an effective plant available form of calcium fertilizer that I have seen result in small tears in the pumpkins skin heal over. Again, it needs to be used in moderation, but this is why it has earned a spot in the line-up when it comes to giant pumpkin growing.
Botanicare Cal-Mag Plus 2-0-0 Label : https://www.botanicare.com/documentation/cal-mag-plus-product-label/
|
|
|
Tuesday, June 18
|
View Page
|
 |
Botanicare Cal-Mag Plus 2-0-0
Suggested Rates:
*Assuming the starting water is�70ppm (on the 700 scale) or 0.1 EC and has a pH of 6.8
Add 24oz. to 132 gallons of water to create a 400ppm or 0.6 EC and pH = 7.3
It is important to remember calcium-based fertilizers need to be applied alone as they do not �play nice� with most other nutrients. (*They tend to form precipitates or solids that drop out of solution.) So, it is not advised to tank mix anything with the calcium-based fertilizers since the odds of interactions are high. So, keep this in-mind with whatever calcium based product you may be considering applying.
Botanicare Cal-Mag Plus 2-0-0 SDS : https://www.botanicare.com/documentation/cal-mag-sds/
|
|
|
Wednesday, June 19
|
View Page
|
 |
Age Old Grow (12-6-6)
This is a fertilizer that growers need to become familiar with (*not sponsored by the company) as it has what I believe to be a secret ingredient in it that pumpkins need more than most growers realize� Manganese. While it does have a good balance of the major nutrients and also some minor nutrients, I think the company is under stating the Manganese that is present in the product. Now, the company is not violating label laws as the law states that the levels provided on the label are guaranteed minimums, but the actual value is very likely much higher than what is listed on the label.
Manganese is an important nutrient for pumpkins that is not talked about much and applying Manganese sulfate has shown only slight improvements based on a tissue test. However, unrelated but adding Age Old Grow the following tissue test showed a jump in manganese levels and with this being the only fertilizer added in elevated levels during the sample period compared to the other common/stander fertilizers this leads me to below that this product has high levels of Mn and this is a good thing.
There is a bloom-based fertilizer (Age Old Bloom), but the Grow is all growers need as it can be used through the entire growth cycle. I did give some to another grower doing some indoor vegetables and they said this was one of the only fertilizers that they could see a noticeable difference in plant growth so there is certainly something going on that plants like, which is why it is part of the line-up.
Age Old Grow (12-6-6) Label : https://www.ageold.com/liquid/
IMPACT OF POTASSIUM AND MANGANESE ON THE QUANTITY AND QUALITY YIELDS OF SQUASH (CUCURBITA PEPO L.) : https://mjss.journals.ekb.eg/article_174279_29a9e2762c1ee9bc762c7adcc95c1ac0.pdf
EFFECT OF FOLIAR APPLICATION OF ZINC AND MANGANESE ON YIELD OF PUMPKIN (CUCURBITA PEPO L.) UNDER TWO IRRIGATION PATTERNS : http://www.ejpau.media.pl/articles/volume15/issue4/art-02.pdf
|
|
|
Wednesday, June 19
|
View Page
|
 |
Age Old Grow (12-6-6)
Suggested Rates:
*Assuming the starting water is�70ppm (on the 700 scale) or 0.1 EC and has a pH of 6.8
Add 32oz. to 132 gallons of water to create a 410ppm or 0.6 EC and pH = 7.5
This liquid-based fertilizer is easy to mix with water and the tissue tests showing the improvement in manganese is an added bonus. It seems that it is more plant available than when powdered forms of manganese sulfate is added and along with the other nutrients it is a good all-around fertilizer. The simplicity of mix and add is nice since there is no need for pH adjustments and the conductivity is very consistent. While it may not be talked about often in the pumpkin community it is one that should be given consideration by growers. *Again, not sponsored by the company😉
Age Old Grow (12-6-6) SDS : https://www.ageold.com/wp-content/uploads/2018/03/age-old-grow-sds-1.pdf
|
|
|
Thursday, June 20
|
View Page
|
 |
BlueLab Guardian Monitor
This is a professional water monitor that in all honesty is probably more expensive than it needs to be. However, it is reliable and does provide the necessary information on one readout so it makes the decision process to add more nutrients or adjust the pH quick and accurate. This is best utilized for an indoor hydroponic set-up where continual monitoring is important. (There are even models that can connect to automatic dosing devices.)
The readouts it provides are Conductivity, Temperature and pH, allowing the grower to select their chosen units for Conductivity and Temperature. There is a pH calibration procedure, but when it was checked with known pH standards it was spot on accurate so it is a great unit despite the price.
However, this is the selected monitor due to the reliability and accurate readings and it falls under the �buy once, cry once� category.
BlueLab Guardian Monitor Manual : https://support.bluelab.com/bluelab-guardian-monitor
|
|
|
Thursday, June 20
|
View Page
|
 |
Maximum Target Levels
This shows the upper target levels when it comes to mixing fertilizer for the pumpkin plant.
Conductivity: Most growers are using EC (electrical conductivity) as this is a universal unit the only issue is that it is not as exact as ppm (parts per million) and growers can more easily over shoot when using EC as it takes greater conductivity to move this value. Ppm moves easier so it makes slight changes noticeable. It is also important to know this monitor uses the ppm based on the EC*700 and if you want the TDS conversion it is ppm*500.
In short this means that 450ppm = 0.6 EC
Temperature: There is not much control over this, but 74F (23C) is a good root zone temperature to allow for efficient absorption
pH: Goal is to have this in the 6.5-7.5 range. While 7.5 is on the high side, since the soil tends to be acidic having a slightly basic solution will help ensure the soil level is not driven even further acidic during the season.
EC to PPM Conversion Chart: https://www.perfectgrower.com/knowledge/knowledge-base/ec-to-ppm-conversion-chart/
While meters do not measure only nitrogen, this is an important nutrient to manage and according to this study on tomatoes� �Nitrogen fertilizer plays a pivotal role in influencing the growth and development of tomato plants.� And they also recommend �growers should consider using nitrate nitrogen (NN) and urea nitrogen (UN) to reduce ammonium nitrogen (AN) application in tomato fertilization.
Effects of Different Forms and Proportions of Nitrogen on the Growth, Photosynthetic Characteristics, and Carbon and Nitrogen Metabolism in Tomato :
https://www.ncbi.nlm.nih.gov/pmc/articles/PMC10748299/pdf/plants-12-04175.pdf
|
|
|
Monday, June 24
|
View Page
|
 |
Day 20 for the (F: 2287 Sadiq '22 x M: 2365 Wolf '21 (from Ron Wallace))
OTT = 182�
Est. Weight = 140 pounds
While this is a tomato study this further demonstrates that cell division normally ends by day 20 after pollination (DAP). This is why the pumpkin was treated with Anthesis plant hormone treatment to extend the duration and rate of cell division.
�The precipitous decrease in the expression of all cyclins in 20 DAP tomato fruit is consistent with the end of cell division phase at this stage of fruit development.�
Fruit Architecture in Polyamine-Rich Tomato Germplasm Is Determined via a Medley of Cell Cycle, Cell Expansion, and Fruit Shape Genes :
https://www.mdpi.com/2223-7747/8/10/387
|
|
|
Monday, June 24
|
View Page
|
 |
Dehumidifier Fail�
While every experiment does not end in success this is one of those cases. As the temperature starts to decrease in the evening the ability for the water to hold air decreases so the level of humidity increases. Seeing this noticeable pattern when it is hard to keep the humidity high enough (on certain days) and then not being able to keep the humidity low enough during the evening, night and morning time frame a dehumidifier was added to the hoop-house.
The goal was to keep the level at 80% and despite being sized for the square footage, the moisture these plants can produce was simply too much for the unit to keep-up. There is nothing wrong with the dehumidifier itself, but it was just not sized appropriately and apparently the correct size would have been too large to run so despite many attempts to make it work it was ultimately removed from the growing environment.
Dehumidifier Sentinel HD55S :
https://www.alorair.com/pdf_files/product_guides/233/AlorAir-Sentinel-HD55S-WiFi-Specification.pdf
|
|
|
Friday, June 28
|
View Page
|
 |
2287 Sadiq '22 Almost Out of Space
This image shows the new portion of the plant that indicates it has just about completely filled the 32ft wide x 40ft. hoop house area. At this point in the season the pumpkin is about 24 days old which is �prefect� timing as the goal is to run the CO2 enrichment system (more details and questions answered to come on this topic in future posts) from transplant until the pumpkin is about 20-30 days old which should correlate to the plant filling the area.
Overall, it looks like the observed conditions are meeting the predicted conditions. With the early pollination this could have caused a disruption, but even though the pollination was early based on the date, it was still 20ft. out so this allowed the overall pattern to stay on track.
|
|
|
Friday, June 28
|
View Page
|
 |
2287 Sadiq '22 Pumpkin and Plant Overview
Committing to the chosen pumpkin early allows for planning and set-up. Here the pumpkin in relation to the plant can be seen and also the two pieces of plywood being used. The reason for the two is the first one is pushed under the vine to the point that the pumpkin is about in the middle of the 4ft. x 4ft. plywood. Two layers of mill fabric are under the plywood and then there are two more on top of the plywood.
The challenge this positioning makes is s second piece of plywood has to be used to keep the pumpkins length on the firm and level surface. In the image the white area is the second 4ft. x 4ft, plywood piece. There is a double layer of mill fabric under this and two more layers will be added to the top, but for now it makes it much easier (and safer) to walk on without the mill fabric. This also shows the clear access to the pumpkin to make inspections and viewing easy. Only difficult part is getting to this area as the plants coverage in the structure is maximized.
|
|
|
Friday, June 28
|
View Page
|
 |
2287 Sadiq '22 Stem End
Here is the result of early pumpkin positioning can be seen. The main vine is initially supported with a pool noodle on each side of the pumpkin and then there is a fan going from pollination to harvest. Getting the pumpkin to lay and develop the initial bottom flat spot when the pumpkin is level is critical. This can take some fine-tuning adjustments early on, but when done correctly this can be the result which reduces the chance/need to move the pumpkin away from the vine later in the season as it grows.
The positioning of the pumpkin in the near center of the plywood is also helpful for later in the season. It allows a firm and flat surface for the fan and helps eliminate the chance of soil contact with the pumpkin. Overall, it just helps maintain a clean area around the pumpkin.
|
|
|
Saturday, June 29
|
View Page
|
 |
Vapor Pressure Deficit- Basics
While CO2 enrichment may have the greatest influence on plants, humidity and more specifically VPD (Vapor Pressure Deficit) may be second in line based on some studies.
The concept of VPD can be quite complicated as the amount of water (humidity) that air can hold changes with temperature. Meaning as the temperature increases the air can hold more water, however it is not a linear correlation since for a given volume of air at 68�F (20�C) can hold twice the amount of water vapor than at 50�F (10�C).
Relative Humidity Information with Graphs: https://www.e-education.psu.edu/earth111/node/557
How Vapor Pressure Deficit Impacts Plants : YouTube
|
|
|
Saturday, June 29
|
View Page
|
 |
Vapor Pressure Deficit- Deep Dive Part 1 or 2
Affinity VPD Gun
This is a quick and easy to use tool, however it seems that it does need the grower to do some calibration to make it as accurate as possible. It does not seem to be as simple as put batteries in and go use. To get all of the reading accurate other sensors need to be implemented to than base the adjustments for this tool to be effective and accurate. Luckily, there are the options for these adjustments, but there is a bit of a learning curve to get each reading dialed in.
This tool can help the grower quickly know the VPD of the plants in the growing area, but a simple infrared laser thermometer and a humidity monitor can also provide much of the same information with the grower needed to either do a calculation or refer to a VPD chart. However, just be aware there are different target levels that can be impacted by the plants stage of development.
Two interesting articles�
Regulating Vapor Pressure Deficit and Soil Moisture Improves Tomato and Cucumber Plant Growth and Water Productivity in the Greenhouse
https://www.mdpi.com/2311-7524/8/2/147
Coordination between vapor pressure deficit and CO2 on the regulation of photosynthesis and productivity in greenhouse tomato production
https://www.nature.com/articles/s41598-019-45232-w
|
|
|
Saturday, June 29
|
View Page
|
 |
Vapor Pressure Deficit- Deep Dive Part 2 or 2
Here is what the readout on the Affinity VPD Gun looks like. While it is nice to see these numbers taken at a random time just to show that it looks like for representative purposes. It is important to know that the handheld devise should be kept in the growing environment for a little while before taking reading so the ambient air and humidity can be accurate. However, based on my findings it is not a simply plug and play device. Other pieces of equipment to compare temperature and humidity against is key to dialing in this handheld tool. I find this calibration step is not often performed by growers and I feel no information is better than wrong information.
VPD is not something to overly get concerned with as there is only so much a grower has control over. Simply take-home message is that as temperatures increase keeping humidity at 60% or greater is important to help reduce the plant stress. Getting good coverage over the growing area is a challenge, but the misting system shown previously on my June 2nd, 2024 posting does offer an example of a simple and effective method.
Great article listed and linked below but full text is copyrighted. However, the over simplified answer is keeping the relative humidity at or above 60% during the day.
Effect of vapor pressure deficit on growth and water status in muskmelon and cucumber
https://www.sciencedirect.com/science/article/abs/pii/S0168945220303617?via%3Dihub
VPD Thermometer, Handheld Environmental Monitor, Captures Leaf VPD and Temperature :
https://acinfinity.com/content/TRV2404X1_240422_VPD%20Thermometer%20Manual.pdf?_ga=2.225954714.1886154692.1720723688-1452909769.1718573613&_gac=1.229322280.1719705546.EAIaIQobChMInI2-rIKChwMVTmFHAR0JjQVMEAQYASABEgKh__D_BwE
|
|
|
Thursday, July 4
|
View Page
|
 |
Day 30 for the (F: 2287 Sadiq '22 x M: 2365 Wolf '21 (from Ron Wallace))
OTT = 284.5�
Est. Weight = 509.5 pounds
Avg. over last 10 days = 36.95 pounds per day
In general, the plant is in great shape and has basically filled its allowed area, which is right on the expected pace. There is still some CO2 left in the current bottle, so once this runs out the system will be removed as it has done its job of accelerating plant growth. Based on previous years of data collection it does not improve pumpkin growth, but does help plant growth. There will be some posts on the basic conclusions of carbon dioxide enrichment now that there are more data points across multiple years to draw more reliable conclusions from.
Only damage noticed at this point is some leaf margin burn. This was noticed last year and some measures were taken to try and avoid it this year, but looks like even favoring less fertilizers and waiting until the pumpkin was at day 13 there is a little damage. In no way is this negative for plant/pumpkin growth, but it is a sign that the line of above optimum has been reached so recognizing this, light adjustments will be made. This can be accomplished by either reducing fertilizer concentration or having �flush� days where no fertilizer is added. To keep a steady pattern the initial idea is to favor less concentrated fertilizer but keep up the daily feedings. Many think that 0.6 EC or 420ppm is already a minimal concentration, but clearly this is too much in this case. This shows the importance of reading the plant and making adjustments.
|
|
|
Friday, July 5
|
View Page
|
 |
Leaf Margin Water Droplets�
Look carefully at this image as there is something important to notice. Looking at the leaf margins water droplets can be seen fairly consistently around the entire perimeter. This is an example of guttation which is basically the result from water being pumped up through the plant so forcefully that it comes out of the leaves. Overnight the humidity is high (in part due to the simple decrease in temperature) so it can not simply evaporate and it remains on the perimeter of the leaf surface.
However, this �water� is more than just plain water, it contains nutrients (salts) that when it evaporates from the leaf surface will burn the margins of the leaf.
The damage could be mitigated by washing the leaves in the early morning with water to flush the concentrated water off the leaves but this would add unwanted moisture to the environment so the resulting burn is just taken as a sign of riding the edge.
Chapter Three - Guttation: New Insights into Agricultural Implications :
https://books.google.com/books?hl=en&lr=&id=QpmKBAAAQBAJ&oi=fnd&pg=PA97&ots=9GLKwFIZNE&sig=MLIwfP2Dba3lKcrrG35OkQOAL0g#v=onepage&q&f=false
|
|
|
Friday, July 5
|
View Page
|
 |
Close-up of Guttation
Here is a close-up of the leaf margin and it shows a more even spread of the water in the edge of the leaf which is more typical. In general, the cause of the even water distribution is the same as the more pronounced droplet condition and this is the area that the leaf edge burn will occur and this is why it is typically seen as an even (but thin) line along the perimeter of the leaf.
A Review of Environment Effects on Nitrate Accumulation in Leafy Vegetables Grown in Controlled Environments : https://www.researchgate.net/publication/341868687_A_Review_of_Environment_Effects_on_Nitrate_Accumulation_in_Leafy_Vegetables_Grown_in_Controlled_Environments
|
|
|
Friday, July 5
|
View Page
|
 |
Leaf Margin Burn
Same thing happened last year, but this year it has been kept under better control and has more limited distribution over the plant.
Did you know that a potassium deficiency and toxicity look the same?
Yes, if the leaf was potassium deficient it would have the same burn pattern, but based on previous tissue tests a potassium toxicity can look the same as a potassium deficiency. This is in part what makes visual diagnosis such a challenge and knowing field history is another important piece of data to help determine the actual cause of an issue.
One possible way to tell the difference is the marginal leaf burn is more likely to occur in older leaves if it is a deficiency and typically if it starts around the pumpkin and in newer growth it is more likely a toxicity.
Marginal Chlorosis on Cantaloupe Leaves :
https://sites.udel.edu/weeklycropupdate/?p=4562
|
|
|
Sunday, July 7
|
View Page
|
 |
CO2 Conclusions Part 1 of 2�
I often get asked questions about carbon dioxide enrichment since I have been using it for multiple years and doing plant comparisons in my own growing space and also comparing to other growers. From this data some answers to common questions can be addressed despite not having a large-scale scientific study.
-What Advantage Does It Provide? (Why add it?)
Quicker plant and root growth without the side effects that excessive nitrogen (bloating and speed plant aging) can have.
-What are the basic required equipment to do this?
CO2 Controller with sensor, Compressed CO2 bottle, Regulator
-What are your target levels?
800-1200ppm with 1000ppm being the main target number
-Is it safe to be in the growing area?
Yes, since the max target level is 1200ppm. At levels above 3,000-5,000 ppm is where it can become a concern to humans.
-How Many Days Does It Gain?
This can be harder to pinpoint, but through years of comparisons and also using other general area growers as a comparison, it seems the CO2 enrichment gains 10-15 days. Which essentially means if a grower starts their seeds on April 1st with no plans of CO2 enrichment, another grower who is using CO2 enrichment can start about 2-weeks later and still have the same plant size at pollination, but on a younger plant.
-Does it Make the Pumpkin Grow Better and/or Go Heavy?
CO2 enrichment does not help the pumpkin grow any better, nor does it help/improve any chance at percent over or under chart.
-How Do You Add It?
A 100ft. 1/8� tube with holes about every 12� is placed in a ring on the ground and around the pumpkin plant which is directly connected to the regulator on the CO2 bottle.
Carbon Dioxide Enrichment of High-value Crops under Tunnel Culture :
https://www.researchgate.net/publication/279363764_Carbon_Dioxide_Enrichment_of_High-value_Crops_under_Tunnel_Culture
|
|
|
Sunday, July 7
|
View Page
|
 |
CO2 Conclusions Part 2 of 2�
-When (time of day) Do You Add It?
The controller senses when there is enough light for the plant to perform photosynthesis and will only dose at this time. However, if the vents are open and the fan is on the controller will recognize this and go into idle mode until the vents close. However, typically the system is on from sun rise until 9:30am and then again from 6pm until sunset. During the heat of the day the vent fan is typically on so the CO2 level is ambient (~400ppm).
-Where Do You Get the Bottles?
Grow shops typically have the smaller 20lb bottle, but for this area the 50lb bottles are used. *The weight is of the CO2 only and not the CO2 + bottle. A full 20lb bottle weighs about 45lbs and a 50lb bottle weighs 175lbs.
For the larger sized bottles, a commercial welding gas supplier is a good place to start looking. It is also best to rent the bottles and not purchase one as they need continually updated pressure certifications so renting may cost a little each day, but it comes out less than the initial bottle purchase and continual certifications needed.
-Why do you use a compressed bottle system and not a burner?
Burners can add the same amount of CO2 as the bottle system, but with the burner comes heat and humidity. These are two byproducts that I do not want to add to my space as the heat is often needed at night when the CO2 can not be used by the plant. Also, the plant transpires enough water so I do not need to add any more.
-How Long do you add it during the season?
It is started at initial seedling transplant to the outside soil and will run until the pumpkin is about 20-30 days old as this is typically when the plant fills the growing area. Remember it is more about the plant than the pumpkin, but the pumpkin age typically correlates with the plant size.
Greenhouse Carbon Dioxide Supplementation : https://extension.okstate.edu/fact-sheets/greenhouse-carbon-dioxide-supplementation.html
|
|
|
Wednesday, July 10
|
View Page
|
 |
Soil Moisture Readings
Since soil types can differ it can be hard to state a specific number to tell other growers to target and what may be ideal in one soil type may not translate to another. So, no matter the system that a grower selects to use it is very important for the grower to correlate those numbers with a physical soil dig and feel.
While it can be nice to have numbers on a screen the overall plant growing area needs to be taken into consideration and simply hitting a �number� may make the grower feel good, but may not be the best condition for the plant.
It can also be interesting to see a comparison of the older plant material to the newer portion of the patch. Having drip tapes with each on a separate valve which does allow the grower to better regulate irrigation to the plant to better dial in the soil moisture based on the uptake efficiencies of different potions of the plant. The moisture meters help provide a quick and unbiased evaluation to help make an informed decision by the grower.
WatchDog 1000 Series with Temp and RH
https://www.specmeters.com/brands/watchdog/1000series-temp-rh/
|
|
|
Friday, July 12
|
View Page
|
 |
Fan Issue (GFCI Problem)
It is important to continually check and recheck all of the systems in place to make sure everything is working properly. Over the last two mornings despite it being hot out and the vents opening, the fan was not. I did reset the ground fault, and it did come on and off as expected for the day, but the following morning, same thing, vents open (indicating the thermostat was working) but no fan.
So, this fix was simple� buy a replacement and change out the old one. However, this shows the importance of always making sure all the systems in place are operating as expected and to also pin point the issue quickly by making the controls as simple as possible.
Ground-Fault Circuit-Interrupters :
https://www.njcomphi.com/uploads/2/0/1/8/20182647/e5_ground_fault_circuit_interrupters_.pdf
|
|
|
Sunday, July 14
|
View Page
|
 |
Day 40 Pumpkin (Plant Overview) (F: 2287 Sadiq '22 x M: 2365 Wolf '21 (from Ron Wallace))
At this point in the season dealing only with the minimal marginal leaf burn seems to be the only issue with the plant. The green color is consistent and is the �correct� color green. It is not deep green nor is it faint, so with the slight margin leaf burn the feeding is near ideal. Plant has maximized its growing space so plant health is important from here on.
Now, the pumpkin looks bigger than it actually is, due to how I set-up the fan and white sheet. (See next post for further details on this process.) There is a white pail that has some play sand in it to help have some near by as the pumpkin has grown over the first plywood base and is now on the second so to ensure no sharp spots a few handfuls of sand can be added to ensure a smooth transition.
|
|
|
Sunday, July 14
|
View Page
|
 |
Day 40 Pumpkin Covering (F: 2287 Sadiq '22 x M: 2365 Wolf '21 (from Ron Wallace))
There is a fan at the stem end and also the large box fan seen here at the blossom end. The extra-large white sheet is pinned down at the stem side and also along the sides to the mill fabric and then to the box fan. This essentially traps the air being added allowing the sheet the balloon up and over the pumpkin ensuring continual and even air circulation. Adjustments can easily be made as the pumpkin grows to ensure nothing is being restricted. This offers the benefit of air movement and also shade on the pumpkin itself.
This does make the pumpkin look bigger than it actually is, but remember pumpkins always look bigger in someone else's patch anyway😉
Since the fan is set back from the pumpkin it also makes quick pumpkin inspections easy.
|
|
|
Sunday, July 14
|
View Page
|
 |
Day 40 Pumpkin Inspection (F: 2287 Sadiq '22 x M: 2365 Wolf '21 (from Ron Wallace))
Well, this is not what I expected this morning, so it looks like my plans have changed for today.
Not sure why this happened on a pumpkin that was growing at a generally average pace and the flower symmetry at the time of pollination was near perfect. There are just somethings that are out of your control and this unfortunately is one of them.
It happened last night so this shows the importance of continual inspections to ensure you are being efficient with your time and not tending to a split pumpkin. Now, the pumpkin efforts will be directed to plant removal, which is much earlier than anticipated.
|
|
|
Sunday, July 14
|
View Page
|
 |
Under Plant View (F: 2287 Sadiq '22 x M: 2365 Wolf '21 (from Ron Wallace))
The fan on the stem of the pumpkin can be seen on the left-hand side of the image. The odd black rectangle in the center of the image is the humidity sensor and on the far-right hand side the black container holds the soil sensor data logger and readout.
Overall, the plant looks great, weed control is spot on and vine burying/top root formation all checks out. Unfortunately, this will all be removed today despite the hot and humid weather, so this is one last look at the plant 40 days after the pumpkin was pollinated.
|
|
|
Sunday, July 14
|
View Page
|
 |
Half-Way Plant Removal
Despite the disappointment, the goal is to take this mid-season plant removal to evaluate the growing practices up to this point to identify weak spots or areas of improvement for future years. Typically, the grower can be the hardest on themselves, and even with this, there is not much suggestions for improvement. Plant material is clean inside and out. There were a few spots of Powdery Mildew and a few Whiteflies, but nothing to be concerned about. The weed control is �VTJohn� level. Drip tapes provided even watering and soil was consistent from old to new growth. Overall, the roots are in good shape, evident by the challenge to remove the vines. The pruning was good which makes the removal organized and efficient.
Now, back to work�
|
|
|
Sunday, July 14
|
View Page
|
 |
Root from the Second Node on the Second Secondary Vine
Not sure why this root/location, but it does represent the older plant material and it was easy to access so this is what is being evaluated. The root only has maybe two surface rot spots on it despite its age and near 20� (50cm) length. Just continued confirmation that the plan that has been implemented is effective at maintaining plant health even in the older material.
|
|
|
Sunday, July 14
|
View Page
|
 |
Day 40 for the (F:2287 Sadiq '22 x M: 2365 Wolf '21 (from Ron Wallace))
OTT = 350�
Est. Weight = 928 pounds
Avg. over last 10 days = 41.85 pounds per day
Easy to measure the pumpkin with no plant around. After doing the calculations and seeing the average over the last ten days just over 41 pounds per day this is not an unreasonable growth rate which was in part, the intention. The goal this year was to try and avoid a super-fast grower (like I had last year that rib slit) in hopes I could get a longer growth period to reduce the chance of a split occurring. It seemed like things were going to plan, early pollination to give more days with a slower pound per day average, but still a season ending split. Sometimes the best plans still do not work out completely.
No seeds were saved due to the blossom end split, so no need to put these genetics into the next generation, even though the cross looked great on paper.
|
|
|
Sunday, July 14
|
View Page
|
 |
Day 40 Pumpkin Cut-Away Inspection (F:2287 Sadiq '22 x M: 2365 Wolf '21 (from Ron Wallace))
This cut down the middle was made very close to the actual split but did not go directly through it and the overall wall thickness does not seem especially thin at the blossom end. Yes, it is thinner at the blossom end, but not paper thin to think it would have ended with a split into the cavity.
The rest of the pumpkin (and plant) seemed to be in great shape, but the end result is only as strong as the weakest point.
|
|
|
Sunday, July 14
|
View Page
|
 |
Day 40 Blossom End Split Inspection (F:2287 Sadiq '22 x M: 2365 Wolf '21 (from Ron Wallace))
Carefully cutting the actual area of pumpkin integrity failure and putting a tape measure on the area, it can be determined that the walls of the pumpkin were about 2.5� (6.32cm) thick. So, while this may be the thinnest part seen on the structure, it is still surprising that this was still the point of failure.
One positive is that is split on Day 40 (July 14th) rather than later in the season so a cover crop can be established and other non-pumpkin tasks can be focused on for the rest of the year.
|
|
|
Tuesday, July 16
|
View Page
|
 |
Cover Crop = Northeast Mix Turf Grass Seed
Many growers select mustard, buckwheat, rye or other typical cover crop seeds, but the reason for the turf grass selection is that is establishes well and can remain until next spring with very easy and minimal care.
Mustard has disease suppression abilities, but has to be managed and cut down at a specific time and then incorporated into the soil which would then need to be followed by a winter cover crop.
Buckwheat is quick to germinate, easy to knock down and can bring in many beneficial insects, but would also need a winter cover crop added.
Rye (specifically Winter Rye) does best in cool to cold weather so this would not establish well this time of year.
Turf Grass is the most expensive option, but it does offer good soil coverage, thick root structure and can tolerate mowing which makes the care of it very easy. Many options with-in this category, but the sun and shade or Northeast mix are the two options that tend to perform best over the long term. Also, if the area is not grown in next year the turf grass will not need any extra attention or replanting. If the area is grown in, then an early season tilling and covering will make it seem like it was never planted.
Great Cover Crop Resource for free�
Managing Cover Crops Profitability : https://www.sare.org/wp-content/uploads/Managing-Cover-Crops-Profitably.pdf
|
|
|
Tuesday, July 16
|
View Page
|
 |
Grass Seed Mixture
Even though the same �Northeast Mix� may be purchases year to year, the seed varieties and the percentages do vary. However, while the exact same blend may not be the same as previous years this category of grass seed blend still performs well year to year.
The seeding rate is heavy with about 15lbs of grass seed added to the 1200sq.ft. planting area. Key is to get it raked in and keep it watered. Overhead irrigation is used for the grass seed as the drip tape is best for the pumpkin so essentially everything is cleared out and just a timer and an oscillating sprinkler is in the patch along with a hose. This allows dry spots to be watered since this is such an important step to good grass seed germination. Three to four times a day the irrigation system comes on at the start and over about two to three weeks this is slowly reduced to the point that the grass is able to survive on the natural rain fall.
Quick Guide to Grass Seed Selection :
https://swellseedco.com/blogs/news/8-types-of-grass-seed-how-to-choose-the-right-one
|
|
|
Wednesday, July 17
|
View Page
|
 |
Grass Seed Irrigation Set-up
The key with establishing turf grass is continual irrigation especially in the early stages of germination. While the irrigation doe not cover the entire area, every other day it is moved and this typically allows enough water to establish the grass seed.
Temperature also plays a role and unfortunately this year the pumpkin failed early so it can be hard to get the grass seed to germinate. However, this week is on the cooler side so it should hopefully improve the odds of establishment.
Date of Seeding Affects Establishment of Cool-season Turfgrasses: https://journals.ashs.org/hortsci/view/journals/hortsci/35/6/article-p1166.xml
|
|
|
Wednesday, July 24
|
View Page
|
 |
Grass Seed Germination
Since the goal is to get soil coverage the rate of seeding is well above the recommended rate typically around 10-12 pounds per 1,000sq.ft. This is working out well and other than a few washouts from a down pour that occurred it will start a good root zone to help build the soil and prevent it from further washouts over the rest of the year.
While this may not be the chosen cover crop for most it does work well and also is easy to maintain over the year since it only requires mowing once established. However, if you want to compare some of the more common cover crops see the following link for key characteristics�
Cover Crop Species and Descriptions: https://iv.ucdavis.edu/files/24446.pdf
|
|
|
Tuesday, October 1
|
View Page
|
 |
Next Years Success Can be Impacted By This Years Fall Preparation
Each topic will be covered in separate detailed diary postings to help improve your odds of success next year. To give you an idea of what to expect, here is the list of the 10 tips�
1. Patch Clean-Up
2. Cover Crop
3. Soil Testing
4. Irrigation
5. Fertilizer
6. Automation
7. Reflect on What Worked
8. Seed Selection
9. Talk with Others
10. Make a Plan in the Winter and Follow It During the Season
|
|
|
Thursday, October 3
|
View Page
|
 |
1. Patch Clean-Up
While at the end of the growing season this can be one of the least �fun� tasks, it is critical to help reduce the potential for disease carry over to the following year. A growers timing is also important as a frost can result in the plant going immediately to mush only increasing the challenge.
Now, the roots are the hardest to remove and while it may not be possible to get them all, any roots that are able to be removed are only going to help achieve the goal of disease reduction. The plant can also hold insects so moving the plant physically off site can also help reduce this pressure the following year.
Many growers elect to apply a fungicide of some kind in the fall, and this would be advised against. The reason is the goal is to reduce the potential population to increase the effectiveness of disease control products in the future.
Consider this hypothetical situation� Fungicide �X� kills 95% of fungus in the soil.
In the fall the final count would be the highest since there is still going to be active plant tissue present. Over the off-season the plant material will die and the fungal count will likely be reduced as well. So, killing 95% of a smaller number is more advantageous than killing 95% of a larger number.
A fall application is often referred to as a revenge kill/application. Basically, it makes the grower feel good, but does not do as much total benefit as the grower would like.
Article Link: https://njaes.rutgers.edu/E310/
|
|
|
Friday, October 4
|
View Page
|
 |
2. Cover Crops
Since giant pumpkins have a long growing season, this can make establishing a cover crop a challenge. However, an effort should still be made no matter the time of year.
Everyone wants to know the �best� cover crop and this answer can vary based on your climate, seeding date, intended purpose and also your plans for next year. Below are some short suggestions for a few common situations�
-Lost plant/pumpkin during the growing season = Buckwheat for quick coverage or Mustard for disease suppression
-Lost plant to fusarium and not planting in the same spot next year = Hairy Vetch and Rye, as the Vetch has fusarium suppressive properties and the rye ensures maximum biomass for the Vetch as it will have something to climb on. Ideally, the Vetch it should go to flower which occurs in the May/June time of year. *You need to chop up the Vetch once you see the purple flowers because if you wait the vines become like rope and are difficult to control as it will wrap around tillage equipment.
-Cold Climate Winter Cover = Winter Rye as it will germinate in temps above freezing or Triticale which offers many of the same benefits as winter rye, but is a better animal feed and will not grow as aggressively as winter rye in the spring.
-Soil Cover with minimal plant height = Clovers as these can also fix nitrogen and if this is your goal inoculating the seed at time of planting is highly recommended.
-What I select = Turf Grass (local region blend) as it establishes well, holds the soil and is easy to manage with a mower like the rest of the lawn.
Managing Cover Crops Profitability: https://www.sare.org/wp-content/uploads/Managing-Cover-Crops-Profitably.pdf
*The image shows a well-established field of buckwheat which is a great in-season cover crop. While it can reseed, leaving the flowers can attract many beneficial insects. Also, compared to many other cover crops, this one is very easy to manage and control.
|
|
|
Saturday, October 5
|
View Page
|
 |
3. Soil Testing
While this may be something most growers do, soil labs typically see a lot less volume of samples in the fall compared to the spring. Also, the soil will not change that much so you should be sampling now to get an idea of what you may need to get so you can have it on hand for the spring.
However, the question of what lab should I use often comes up and in short there are really no �bad� labs that are professionally run. Where the differences may be turnaround time, cost and detail of results provided.
Some labs charge a high price and this does not make the results �better� but it typically means you will get the results faster. University labs have been the standard but can have a slower response time than the commercial options.
One thing to keep in-mind is that different labs will use different extraction fluids and also may use different units. Remember that a soil test does not provide total nutrients, but an estimate of plant available nutrients.
I refer you to this video for more details as well� �Selecting a Soil Test Lab (3:17) YouTube Video- Path of Soil in a Soil Testing Lab (33:42) https://www.youtube.com/watch?v=sq5UuJ4vfGk
How To Take a Soil Sample (13:52) https://www.youtube.com/watch?v=AldLtuolyok
|
|
|
Sunday, October 6
|
View Page
|
 |
4. Irrigation
Water management is a very important aspect to pumpkin growing and this is something all growers need to consider to some extent. While hand watering is an option some form of mechanical method should be implemented and hand watering should be done as needed or in addition to this more standard method.
The use of drip tape is probably one of the most efficient methods as it delivers the water directly to the soil and is not impacted by above ground plant material. Overhead watering can be effective and is typically the least expensive method but wetting of the leaves and the amount of water lost via evaporation are two negatives for this method.
Another advantage of drip irrigation is the ease of automation and also fertigating. This can save the grower many hours over the growing season and will help with consistency to the plant.
While no system is perfect drip irrigation does require some initial expense and a little time to set-up. However, these drawbacks are minimal compared to the benefits and this is the reason this is a very common method of irrigation on both small scale and large-scale operations.
For full details see this article, �Performance and evaluation of drip irrigation system, and its future advantages�
https://pdfs.semanticscholar.org/bac8/93d192c8e40eb145863c340bd849ce79b5c7.pdf
|
|
|
Sunday, October 6
|
View Page
|
 |
5. Fertilizer
Looking at all of the fertilizer options it can be a bit of a challenge to know which ones to select. What can further complicate things is the simple fact that there are many quality options out there.
I recommend three main fertilizers (not sponsored by any of them) with a little boron and some micros on hand to use if needed. Each serves a specific purpose and all are used in rotation throughout the growing season. Seeing growers add a dozen or more products can be more of a feel-good effect rather than increasing yield.
I did not start fertilizing until the pumpkin was 13-days old as the plant looked like it was in good shape other than a little iron deficiency the first week post transplanting outside.
It is also important to remember that over fertilizing can have the same negative impacts on yield as under fertilizing, but getting to an excessive level is harder to correct.
In my situation I use these main three fertilizers�
Age Old Grow (12-6-6)
Good blend and I believe (based on tissue tests) that it is high in Mn, which is a nutrient that may be more important to giant pumpkin growing than most realize.
Botanicare Cal-Mag Plus 2-0-0
Always beneficial to have a Cal-Mag product as calcium can be a challenge to get to sufficient levels in the plant and the magnesium aids in plant uptake.
Nutriculture K-Mag 15-5-30 (plus trace elements)
This is just a good all-around general feed of key nutrients in a readily plant available form.
*See June 17th-19th postings for complete details.
Photo was taken on July 14th when the pumpkin was 40 days old.
Recently published article- Comprehensive evaluation of the water-fertilizer coupling effects on pumpkin under different irrigation volumes : https://www.frontiersin.org/journals/plant-science/articles/10.3389/fpls.2024.1386109/full
|
|
|
Tuesday, October 8
|
View Page
|
 |
6. Automation
This is an interesting topic and one that does not nessiraily mean complicated or expensive. The idea of automation is to provide consistent conditions that allow the grower to plan and make adjustments from.
The most obvious type of automation is timers and these can be light and/or irrigation timers. Using these along with the drip tapes can ensure a continual and reliable source of water for the pumpkin plants. Now, if the grower wants to add more or notices dry pockets they can make this adjustment. The goal of the automation is to provide that base to make adjustments from.
Ideally, the automation would regulate both positively and negatively based on conditions to help ensure the growing environment is kept in a certain pre-determined range. An example of this would be a heater and a vent fan connected to the same dule stage thermostat to keep the temperature in the grow space between two preset temperatures.
If a grower wants to control multiple environment aspects there are two schools of thought. One is to buy the �best� for each given condition, which isolates all of the systems so if one fails ideally, it is only one component. The other idea is to have a central �brain� where all of the sensors feed into to ensure no conflicts with the system operations. This has the benefits of easily comparing all of the conditions, but if the brain fails so does the entire system.
I have chosen to go with the series of independent environmental condition automation. It works out great, especially early in the season as can be seen in the image.
This study looked at grower controls vs artificial intelligence supported regulation of greenhouse conditions in relation to cucumber production�
Remote Control of Greenhouse Vegetable Production with Artificial Intelligence�Greenhouse Climate, Irrigation, and Crop Production
https://www.mdpi.com/1424-8220/19/8/1807
|
|
|
Wednesday, October 9
|
View Page
|
 |
7. Reflect on What Worked
Many growers need to take a rest and with the ups and downs of this hobby it can be critical. However, a �rest� does not mean doing anything, but it means doing something different. In order to keep the progression positive, the goal should be to take a moment to reflect on what has been working for you and what areas you need to improve on. This can be time out of the patch but you are still working on refining your growing practices when you get back into the patch.
Do not spend much time out of the patch, but take a little time to look at the areas you can improve on and get some new ideas to make these improvements. This can provide you with a new vigor and improve your interest and focus in the patch which will also improve your final weights on the scale.
Searching for research is another option that can allow for some quality computer time to gain some more information to hopefully improve your growing skills.
The key to be able to reflect on your own practices is the need to properly document what you are actually doing. While this concept is universal, the method of implementation is up to the grower. Some ideas include a bigpumpkins.com dairy, images on your phone, a slide show, a desk calendar, a note book, or a white board. The platform you use does not matter; the goal is to select something that you will actually use.
We can all be a busy as bees, but even they need to take a break at times.
Consider developing a SOP (Standard Operating Practice) for your growing process. While this information may be a little over the top, you can tailor it to your style and level of detail.
Cultivation SOP Guide: https://www.prospiant.com/the-ultimate-guide-to-sops-for-the-cannabis-industry/
*High Level of Detail* CANNABIS CULTIVATION STANDARD: https://www.afdo.org/wp-content/uploads/2023/09/FS-1001-FOCUS-Cultivation-Standard.pdf
|
|
|
Thursday, October 10
|
View Page
|
 |
8. Seed Selection
Every grower has their own theories when it comes to seed selection for next year. There are many quality seeds that may never get planted so any giant pumpkin seed with a quality lineage is worth consideration.
General theories
Big x Big = This is where growers are looking for seeds from two big pumpkins are bred together in hopes of keeping the genetics of big pumpkins into future offspring.
Plant the Winner = Idea here, is that if the pumpkin is a genetic standout, at least half of those genes should be present in the seed.
Look at the Pollinator = When looking at a pumpkin, you are only looking at half the genetics and the pollinator must be considered as it influences the resulting offspring. What traits are more impacted by the pollinator are up for some debate, but it seems like color can be impacted by the pollinator.
Plant Proven Seeds = All seeds start out unproven and someone has to be willing to take the chance in order for it to have a chance to become proven. So, there are some grower's names that have had success in the past so growers are typically not as reluctant to plant unproven seeds if the grower is proven. This does skew the data.
Hybrid Vigor = This idea is centered around breeding two different lineages together in hopes that the combination will be better than any of the previous generation. Botanically to get this each lineage would have to be selfed for about 7-9 generations.
Look at the Offspring = Yes, this does seem obvious but consider: Did the offspring set a new personal best for the grower? Was the offspring big for the area it was grown in? Was it pollinated late and still grew large?
In the end plant a seed that you want to grow as you will be spending quite a bit of time with it so make sure you are excited to grow the seed and you are growing simply because it seems to be the �hot� seed.
Unraveling the genetic basis of hybrid vigor: https://www.pnas.org/doi/epdf/10.1073/pnas.0605627103
|
|
|
Friday, October 11
|
View Page
|
 |
9. Talk with Others
This can be an intimidating task, especially for new growers, but this is an important act that can help improve your success. There are many different ways to accomplish this seemingly basic task.
First off, going to a weigh-off with or without a pumpkin is one way to quickly learn who is in your area. Learning about the challenges of the season and who was able to adapt and adjust can allow you to pick-up valuable suggestions for improvement. This often lets you quickly know who is in your local area.
Second, there are diaries and posting here on bigpumpkins.com There is a strong establishment of season growers here and what makes this important is that many are willing to chime in and help growers of all levels. Now, do not take this as a free for all on questions, at this moment there is access to years of information to provide a starting point. After doing this initial research it will allow you to ask more detailed and in-depth questions.
Third, there are off-season growers' meetings that can also be another valuable resource. These can include some local events or the International GPC Convention which is a great opportunity if you are able to attend.
When it comes to the actual conversation, be sure to introduce yourself and have a few key questions ready. Or you can have a recent soil test in-hand for more experienced growers to take a look at as this shows your seriousness and while you may get some different answers from different growers, it will still be a great conversation starter.
|
|
|
Saturday, October 12
|
View Page
|
 |
10. Make a Plan in the Winter and Follow It During the Season
As we enter the �off-season� it is not really a season free of pumpkin growing, just the tasks are different. While you may not be actively growing this is the time to put the time into refining what worked and what needs to be improved on for next year. You only get one growing season so you need to make the most of it.
The most efficient method during the growing season is to have a plan and creating a plan in season is not recommended. Refining the plan in-season is often needed, but the time-consuming task of creating the plan should be done in the off-season. This allows you to focus on the details and develop something that you can have confidence in.
Once you have a plan when the business of the season begins you will have something reliable to fall back on. The basis for the plan should come from your notes from last growing season with key items such as when the first Cucumber beetle was seen to when you may have seen a nutrient issue are al good data points that allow for increased odds of prevention to occur the following year.
Each grower may have their own unique method and process, but the main goal is the same� Make a plan and refer back to it during the growing season to help stay ahead of issues.
Pictured is Downy Mildew in Cucumber which is a key disease of concern.
|
|
|
Saturday, October 19
|
View Page
|
 |
New York Botanical Gardens: 2670 Thompson '24
Always a great time to see the giant pumpkins that come to the New York Botanical Gardens and this year certainly did not disappoint. Not only seeing a 2670-pound pumpkin is rare, but getting a chance to also see the inside is a unique experience. When we think about where the weights can reach going forward it is pumpkins like this that have a great symmetry outside and a consistent internal structure that give hope to a new World Record potential.
The weather was great and seeing the public interact with the pumpkins is always an interesting time. While some questions are often repeated the shear amazement, they have does not seem to get old. This is in-part what makes giant pumpkin growing so unique with the shear size that they can reach and the continual challenge to do better and make improvements year to year to set a new personal best.
|
|
|
|